CV Files User Guide
With the CV Files app, you can connect your Google Drive and OneDrive to Salesforce and upload files, link a file or folder to the Salesforce record.
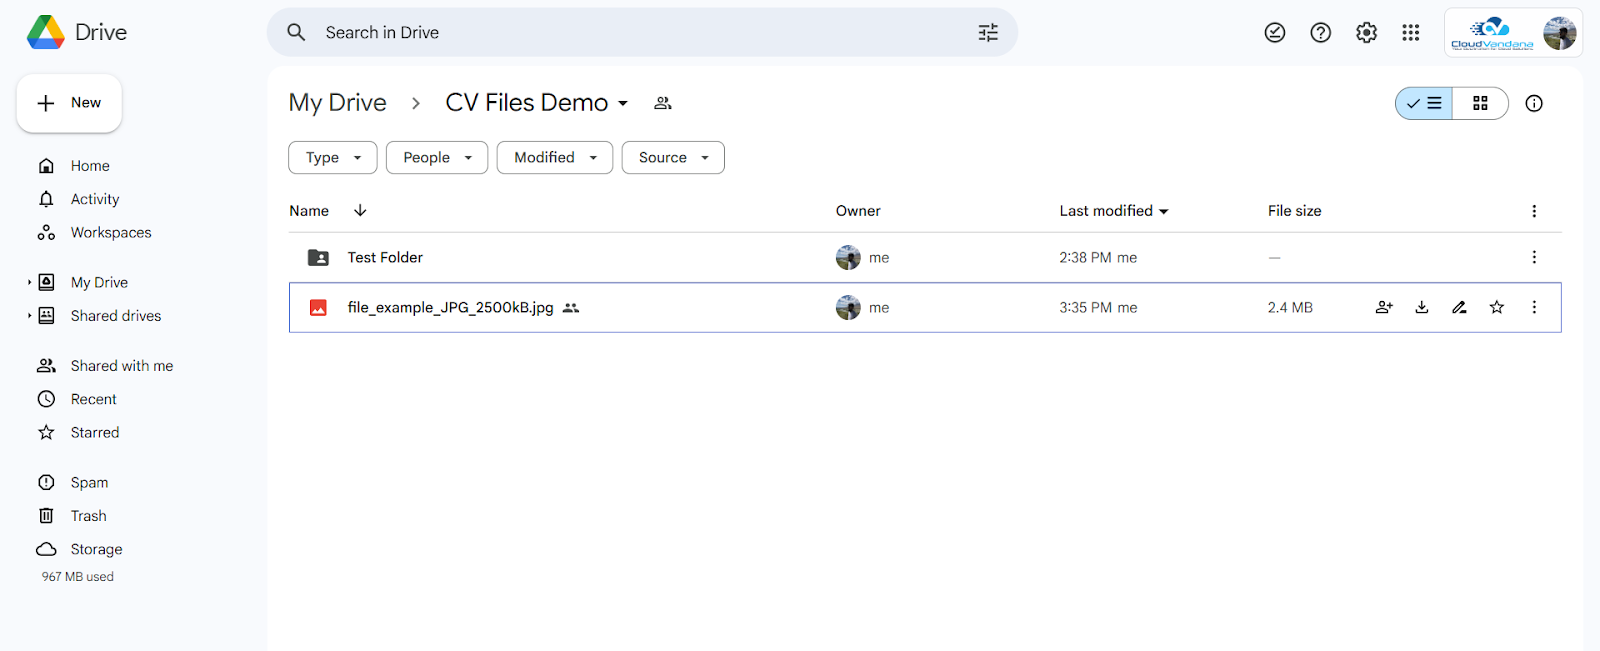
Google Drive
Uploading a File to Google Drive
Selecting Destination:
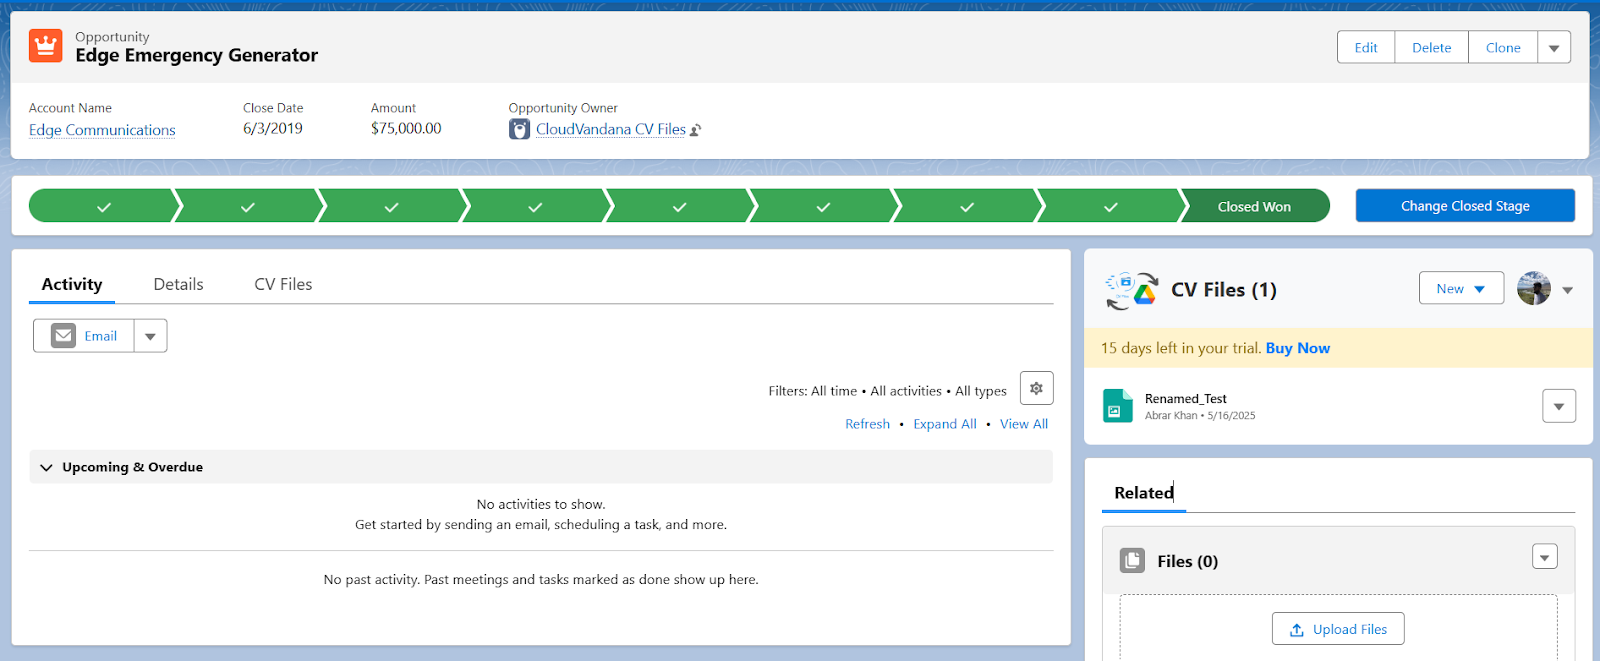
Now, if you navigate to the App Launcher and select the object to which you have added the CVFiles component, you will see it.
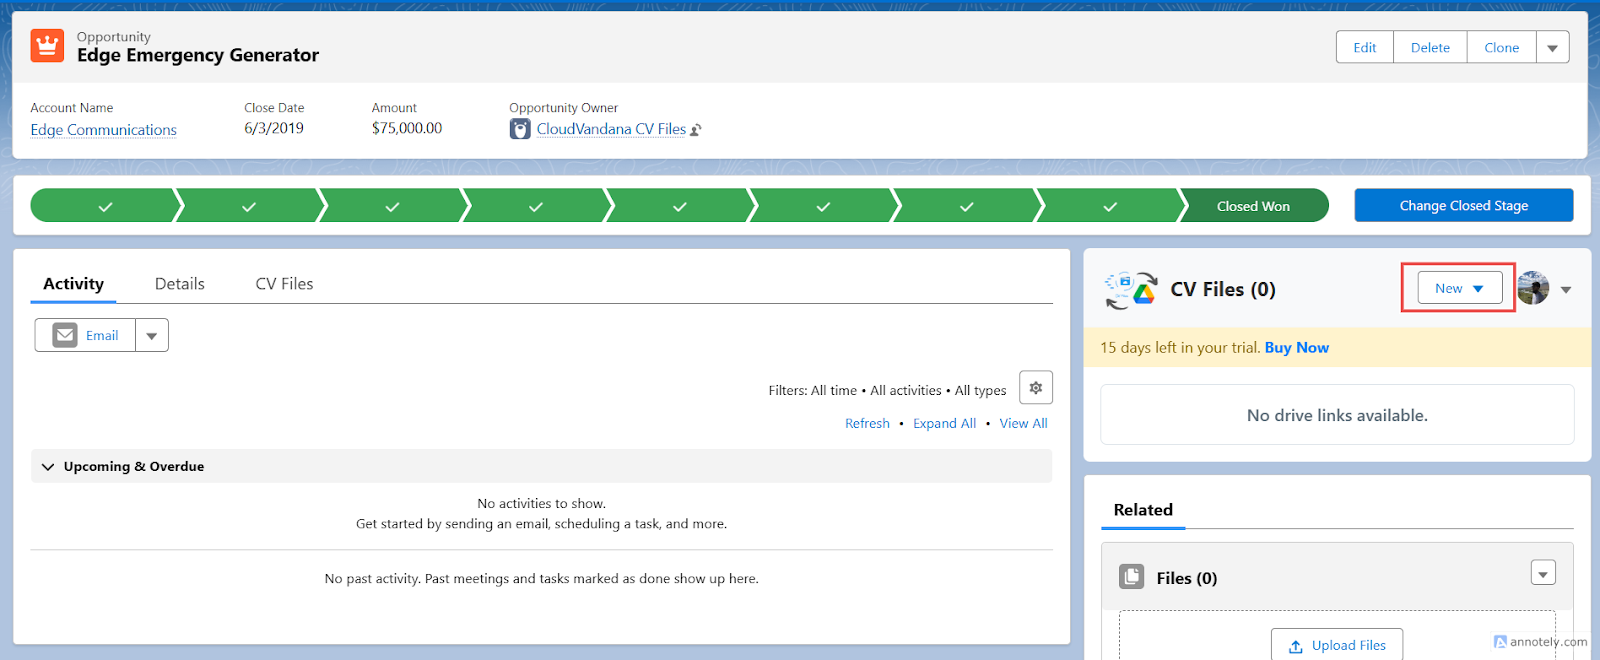
Click on the “New” drop-down button next to the user avatar and select Upload file. It will open a pop-up.
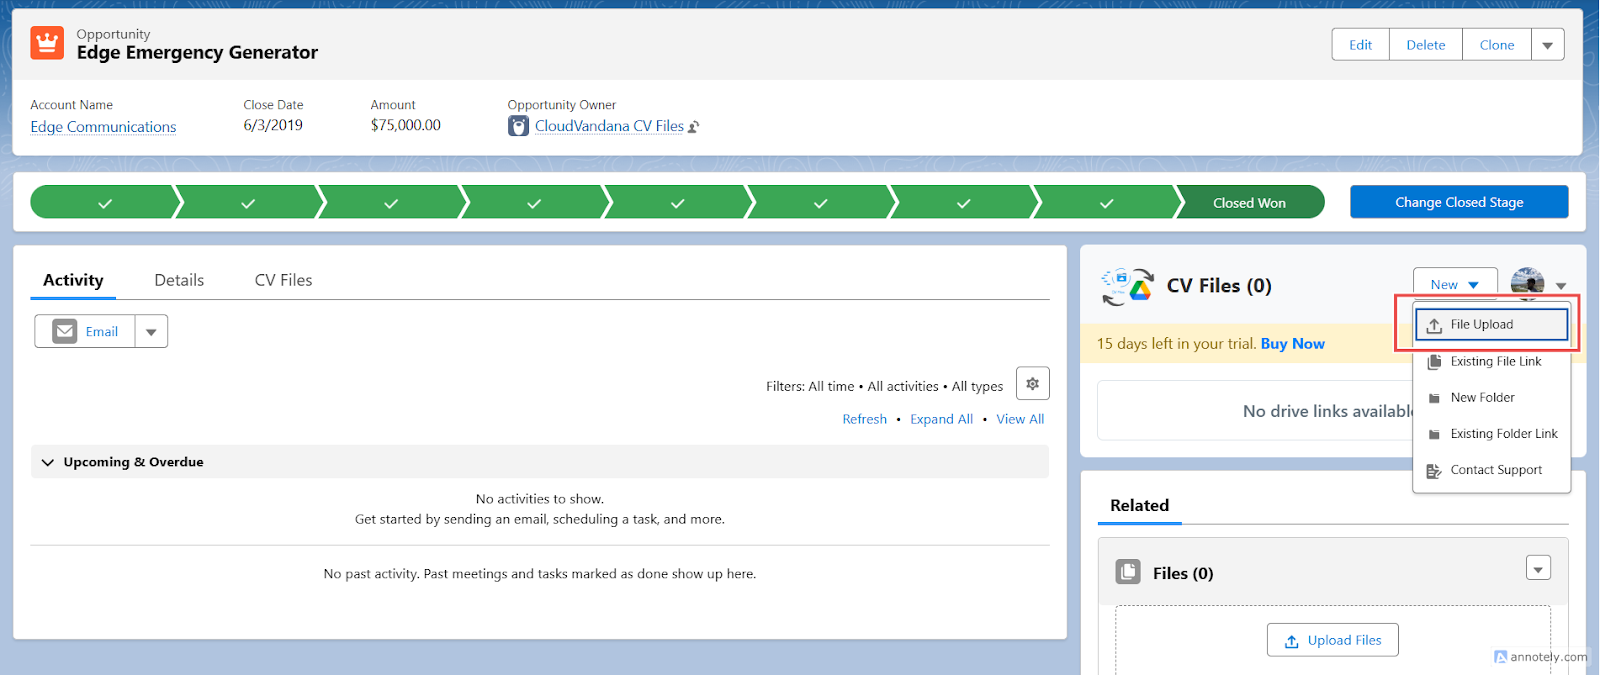
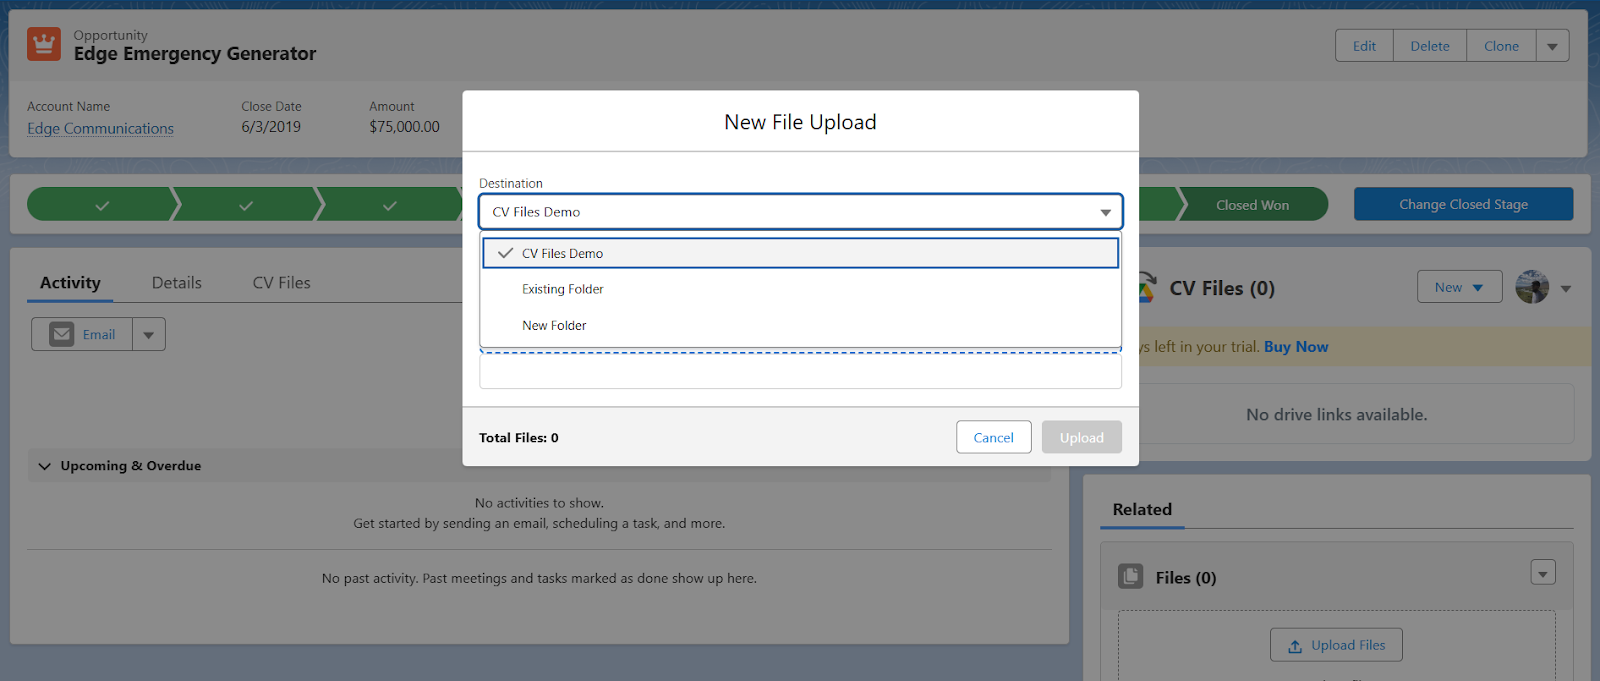
When you upload a file to Google Drive from a Salesforce record, you’ll be presented with a “Destination” dropdown. This allows you to choose the destination folder where the file will be uploaded. This feature offers flexibility for different use cases—whether you want to use a default folder, pick a custom folder, or create a brand-new one.
Folders List: This is the default list you see in the dropdown. It shows all Google Drive folders previously linked to the current Salesforce record, with the default folder (mapped in setup) displayed at the top.
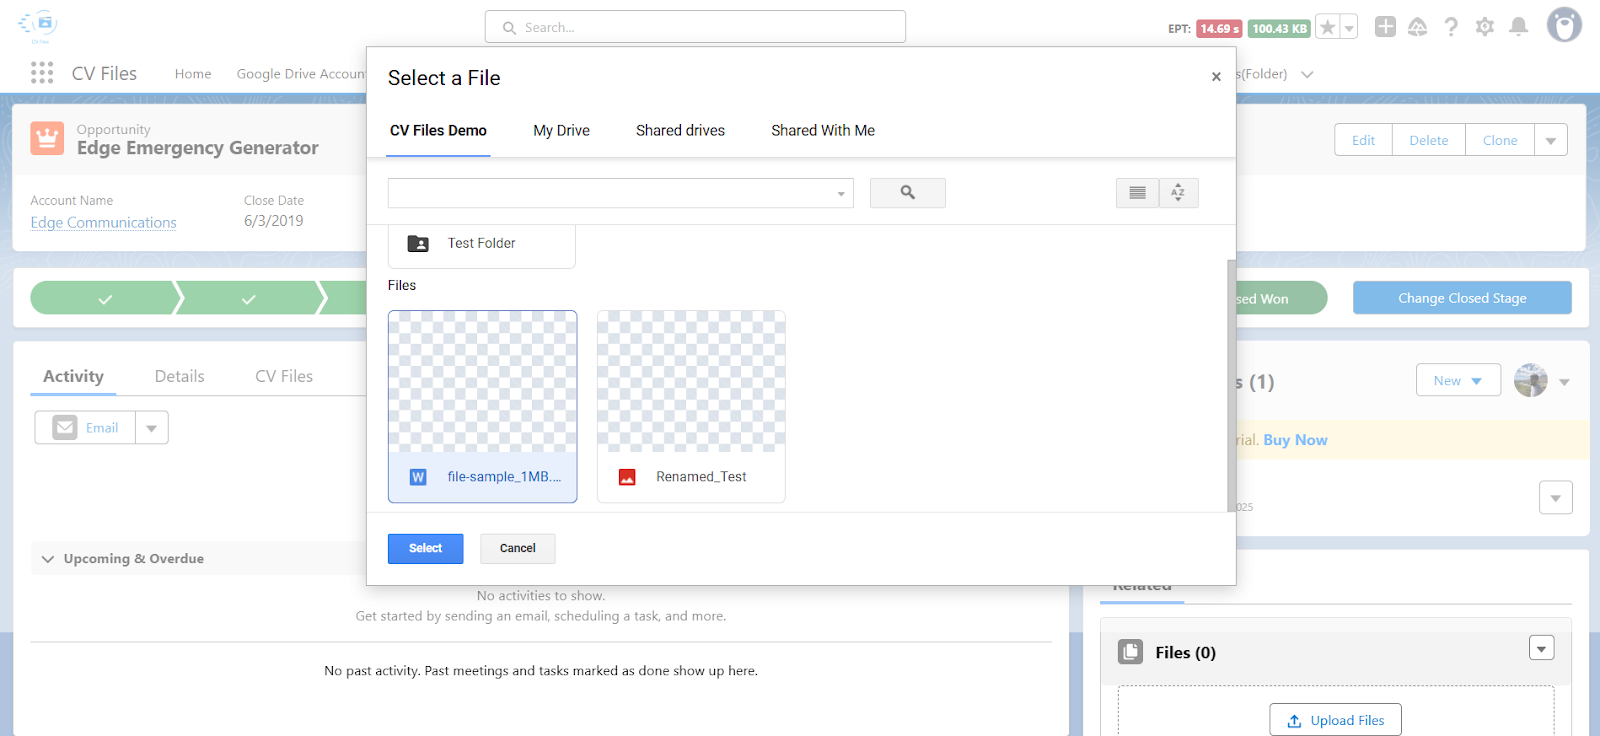
Select Existing Folder: This option opens the pop-up, allowing you to manually browse and select any folder in your Google Drive.
How to Use:
Click on “Select Existing Folder” from the dropdown.
A pop-up appears.

Navigate through your Drive (including Shared Drives, My Drive, etc.).
Select the folder you want → It will be set as the active folder for upload.
Steps to Create a New Folder:
Click on “New Folder” from the folder selection dropdown.
A form will appear with the following options:

1. Name of the Folder: Enter the desired name for the new folder. Example: Q2 Financial Reports, Client Onboarding – Acme Inc.
2. Parent Folder Selection: By default, the folder will be created under “My Drive”.To change the parent location:
Click the pencil icon.
This will open a Google Drive pop-up.
Browse and select the desired parent folder.
The selected folder will be shown in the field.
3. Link Folder to Record (Checkbox): Enable this option to link the new folder to the current Salesforce record.
4. Set as Default Folder (Checkbox): Check this option to make the newly created folder the default folder for this Salesforce record. Future uploads for this record will automatically go into this folder (unless changed manually).
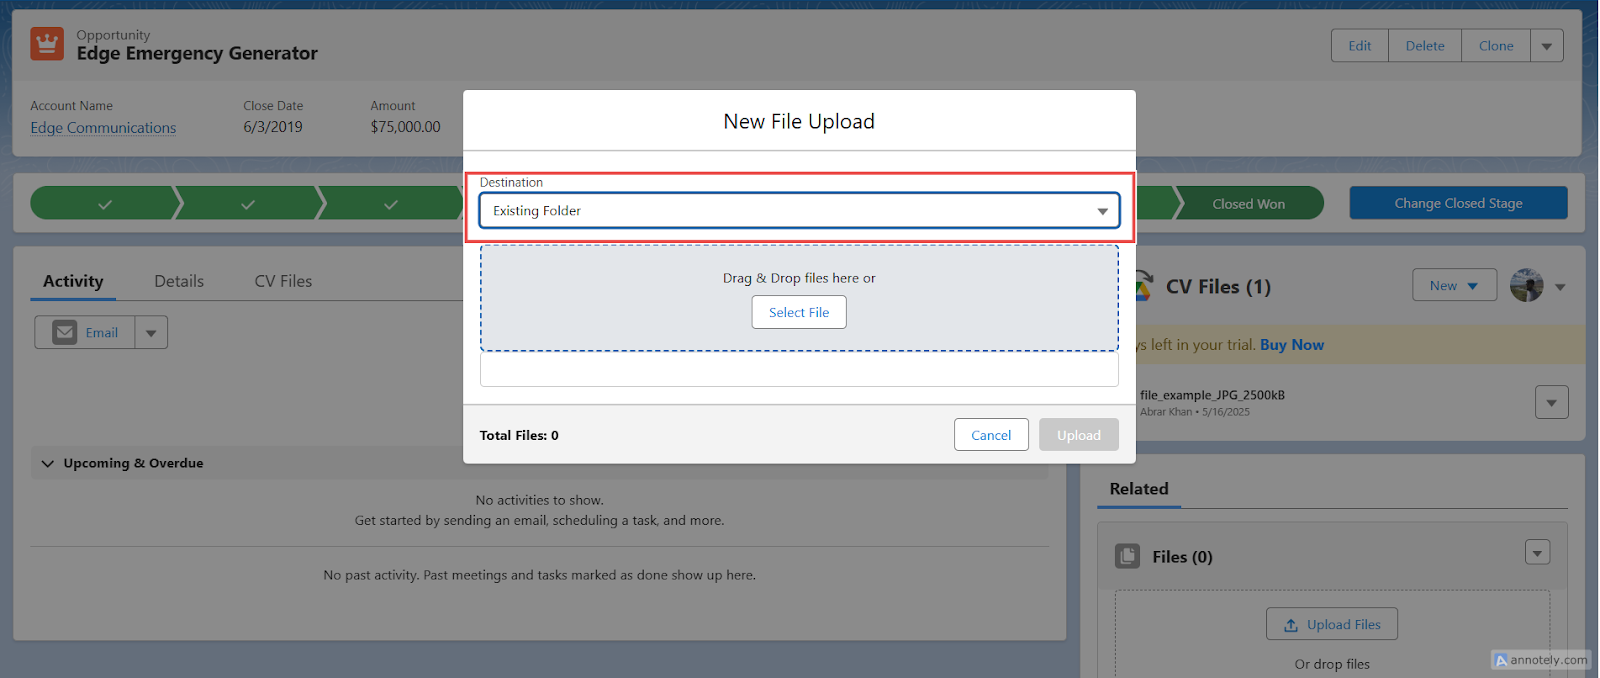
Choose Files

1. Drag and drop files or click the “select a file” button to open the file selector. Select a file and click open.
2 . The pop-up will display the file with the following options:
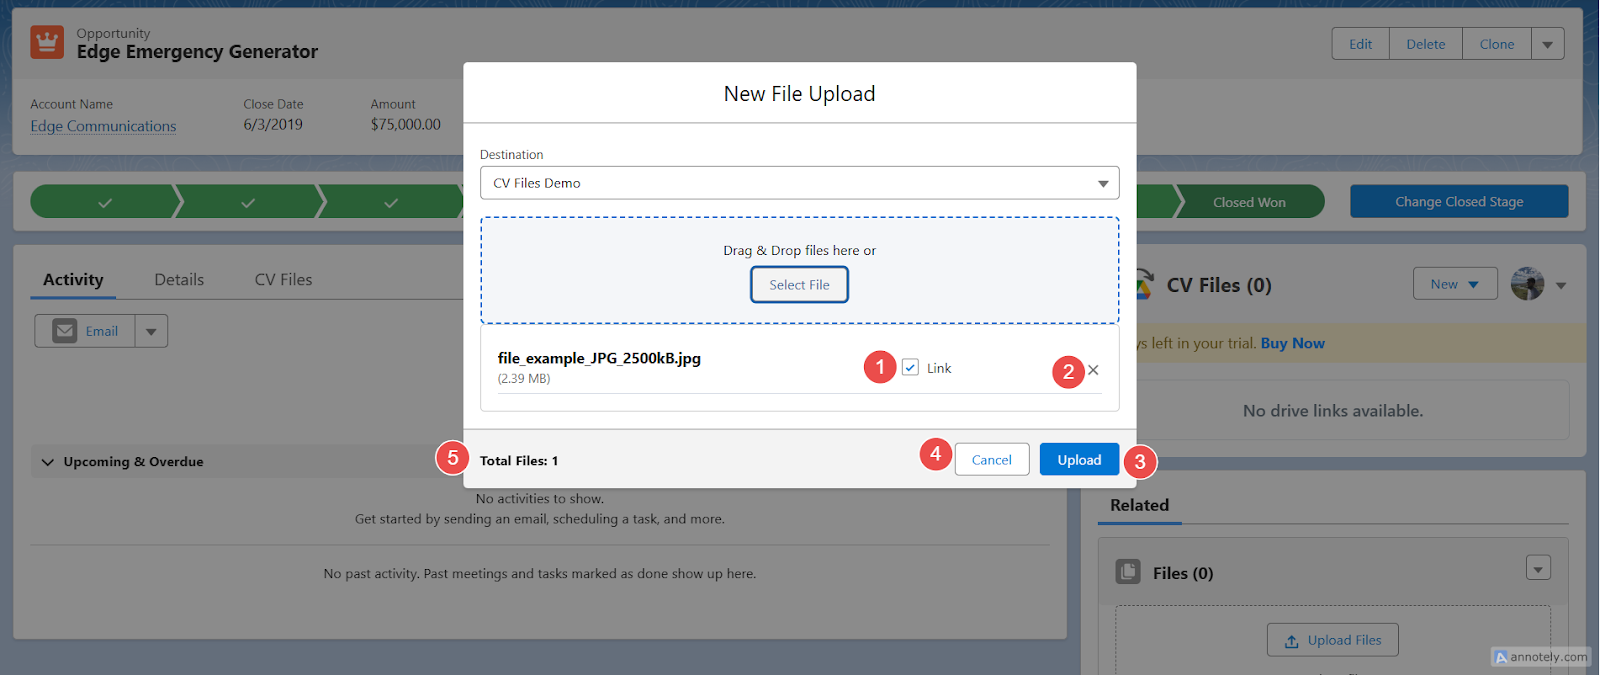
CheckBox: Check the box to link the file to the current Salesforce record.
Click the cross Button to remove a file from the list.
Click the “Upload” button to upload files to Google Drive.
A cancel button to close the pop-up.
Display the total number of files.
3. Click on the upload button to start uploading the file. This also shows the progress bar for each file.
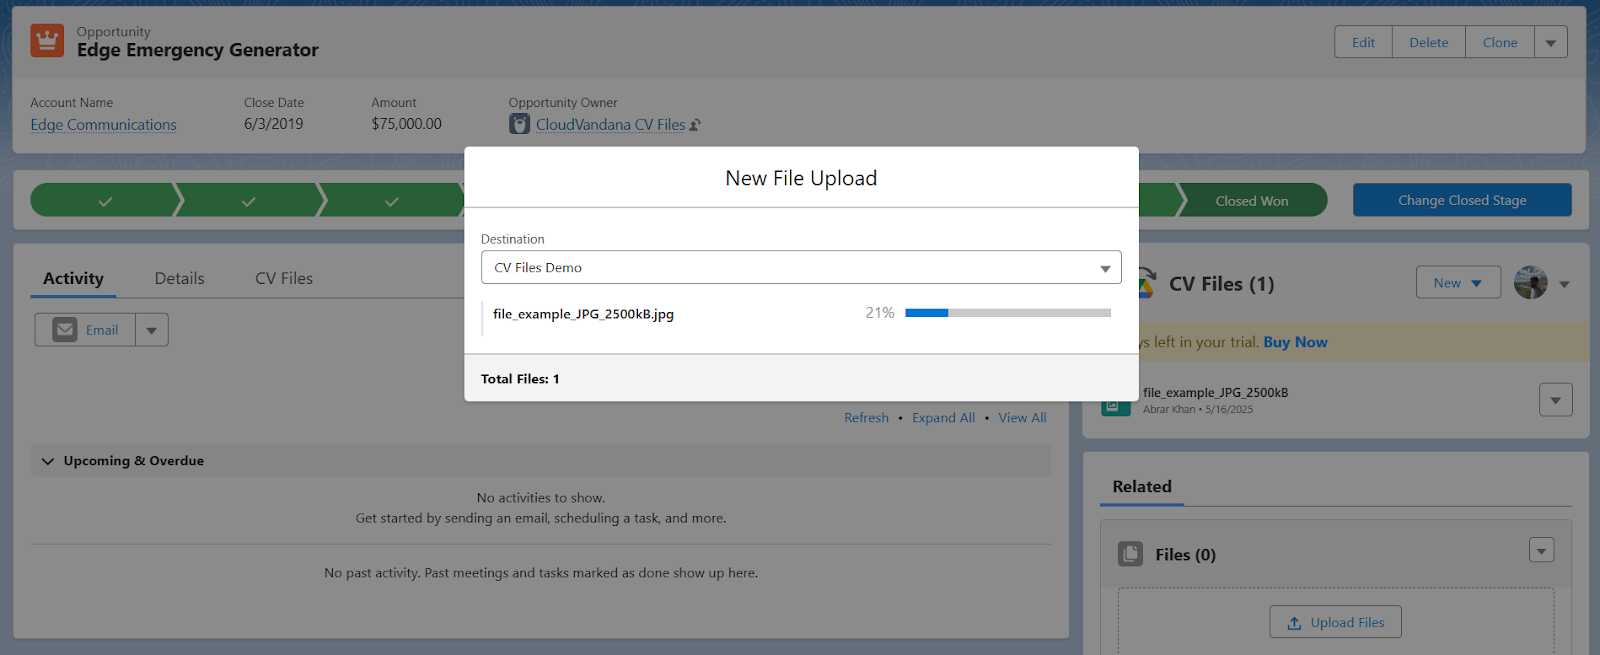
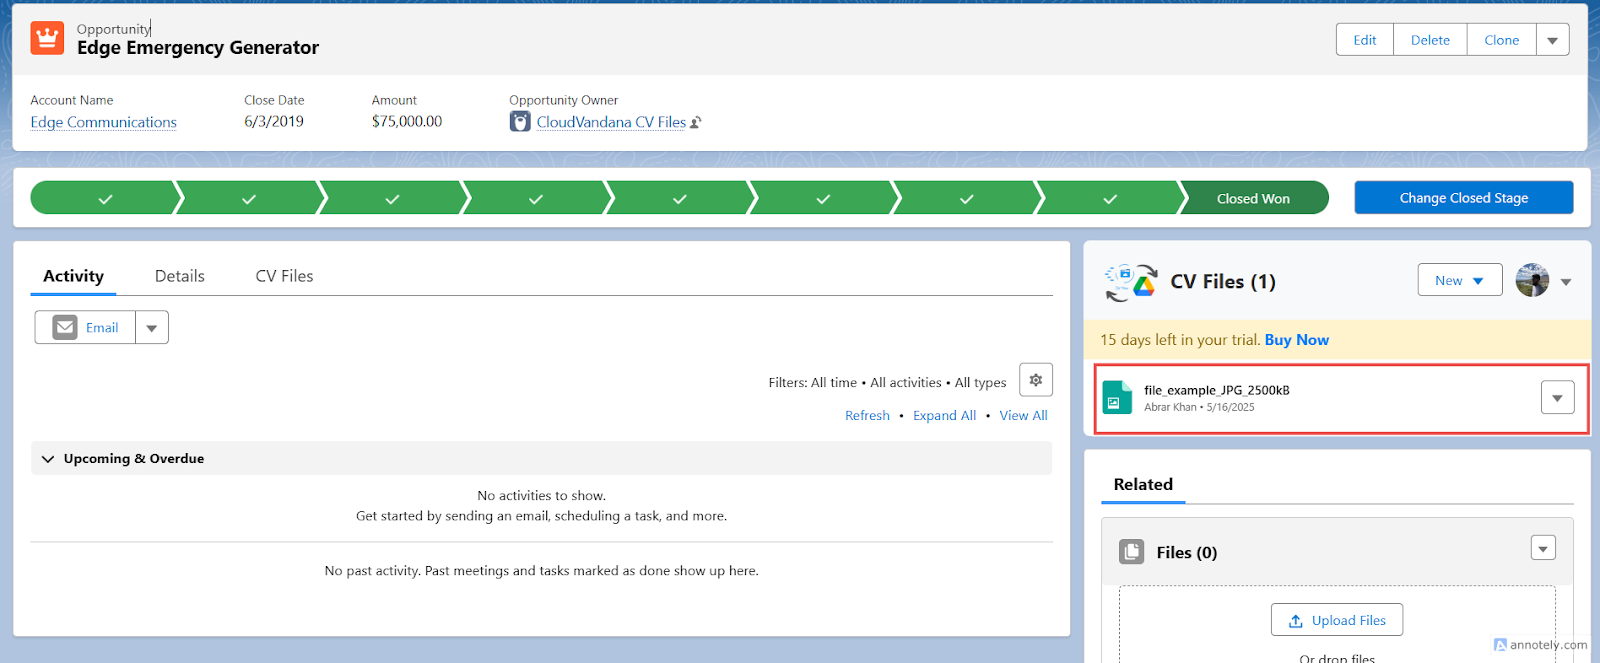
4. If the file gets successfully uploaded, the values in the pop-up get reset for another upload, or the user can close the pop-up by clicking the “Cancel” button.
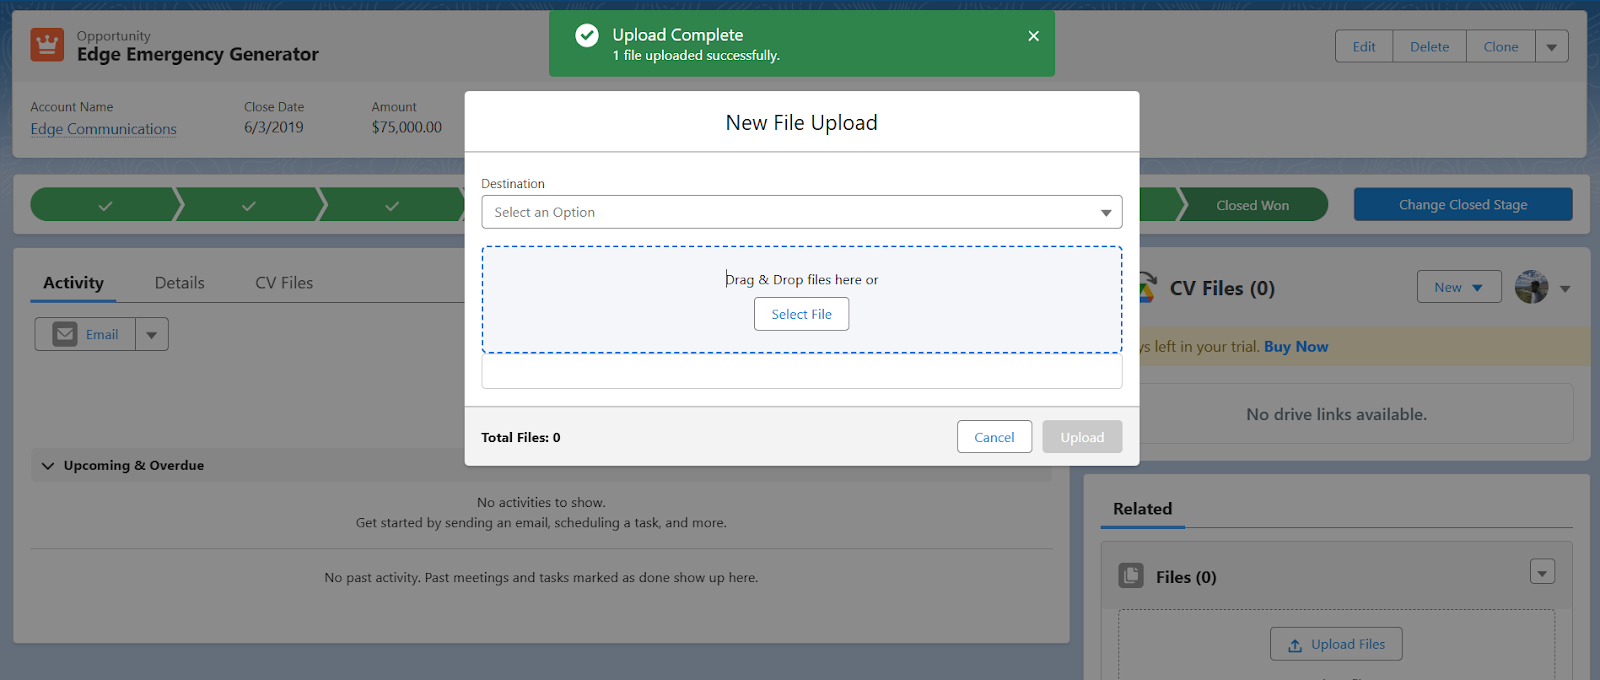
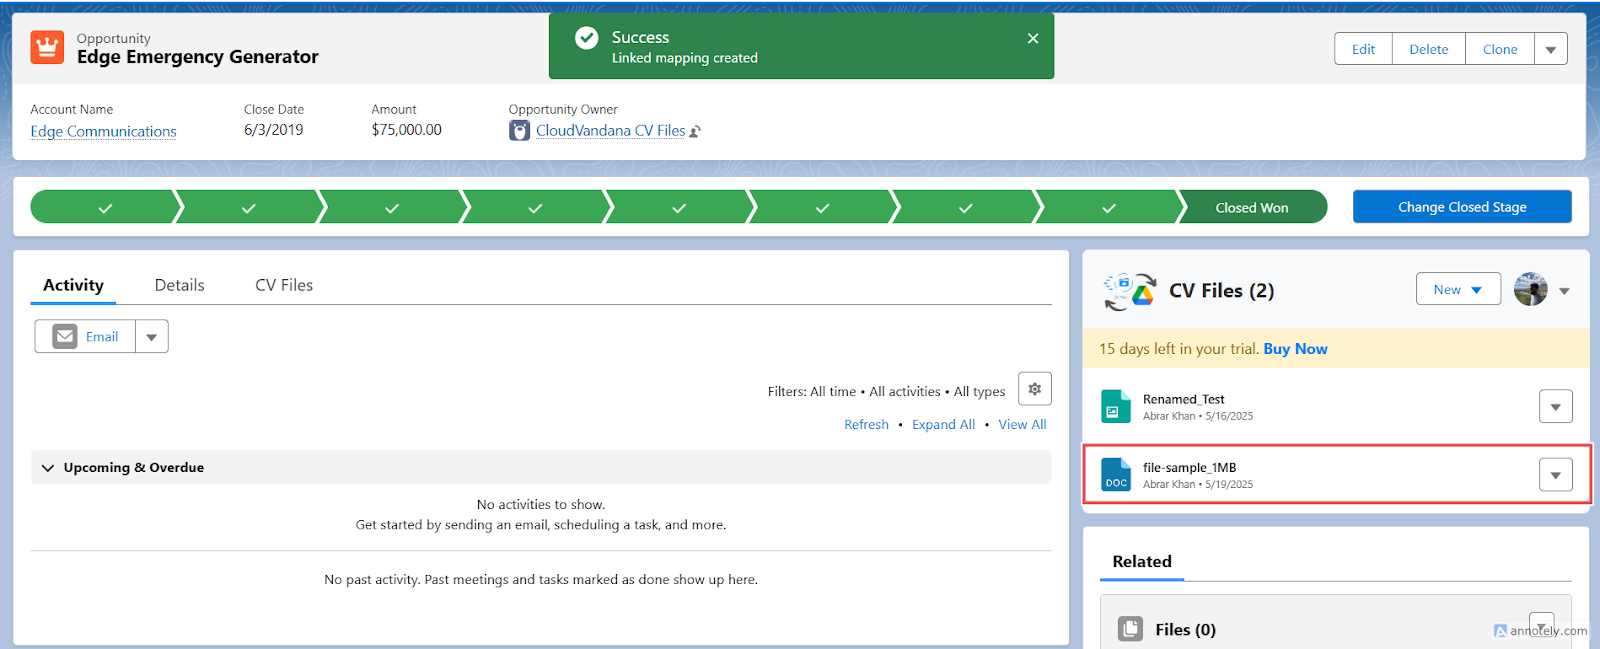
On closing the pop-up, the component shows the link file.
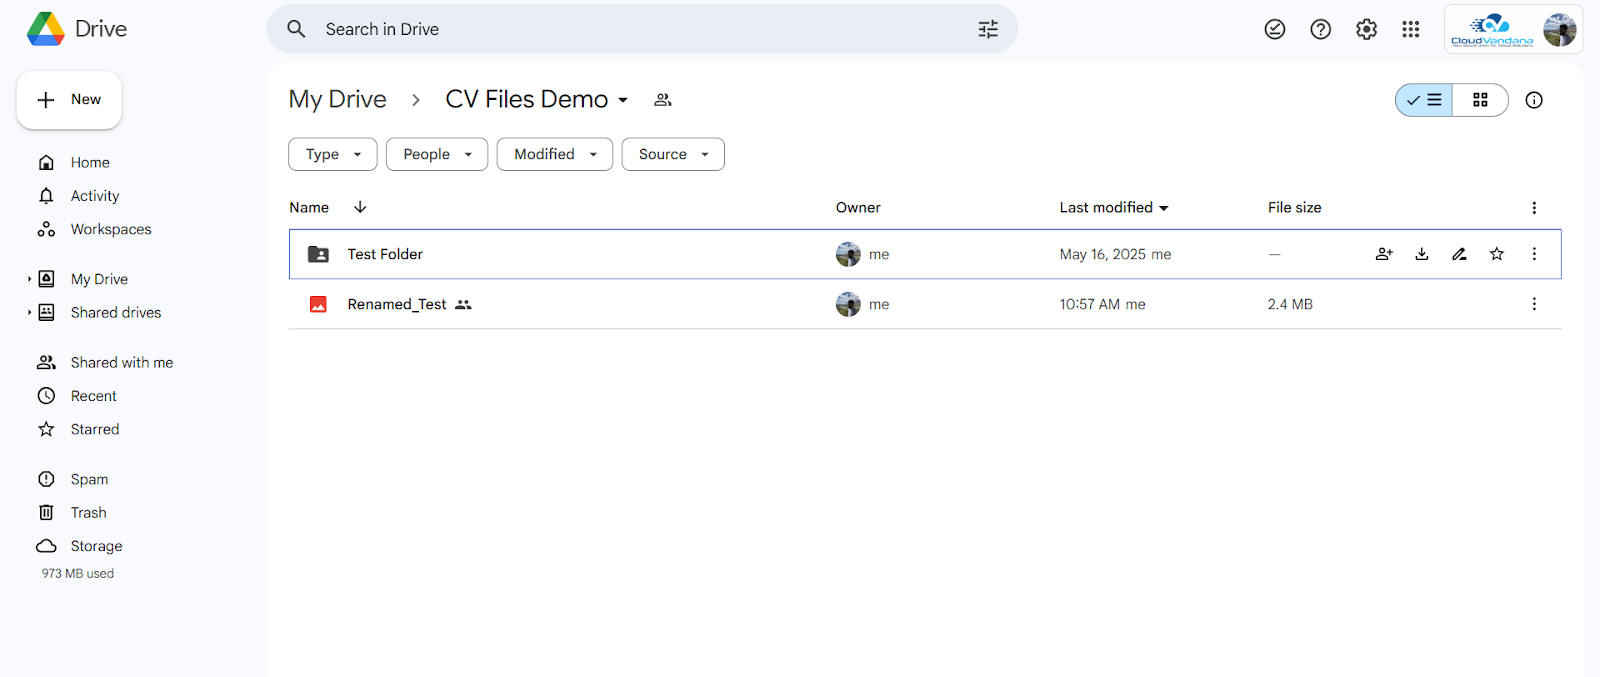
In the Google Drive
Linking Existing File/Folder:
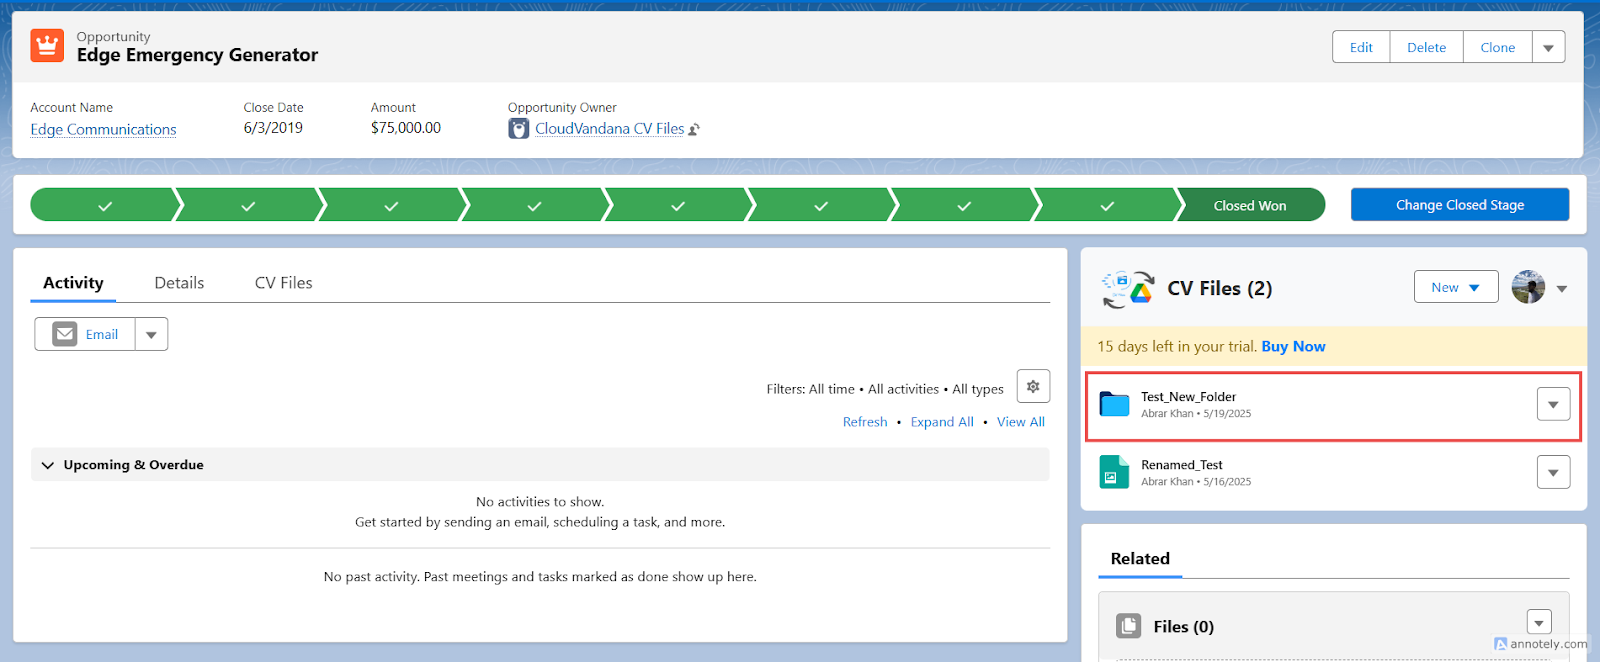
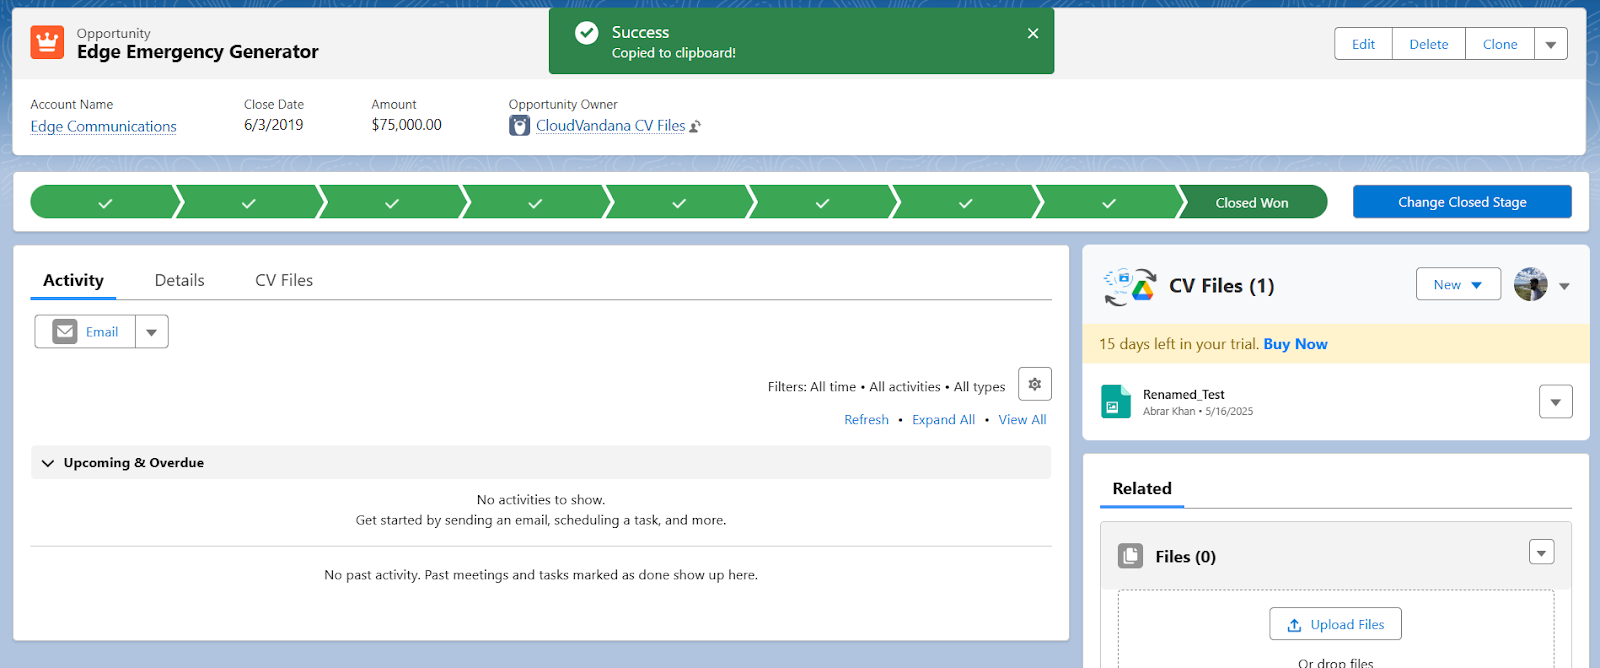
You can link an existing file or folder from Google Drive to a Salesforce record using the file management interface. The files/folders remain in Google Drive but are now associated with the record for easy access and management. You can unlink, rename, or set the default status for linked items at any time using the action menu.
Click on the “New” drop-down button next to the user avatar.
Select “Existing File Link” or “Existing Folder Link”. It will open a pop-up.

Navigate through your Drive (including Shared Drives, My Drive, etc.).
Select the file/folder you want to link to the Salesforce record.
The selected file/folder will appear in the linked file list in the component.
New Folder Link:
You can create a new folder in Google Drive directly from within Salesforce and automatically link it to the current record.
Click on the “New” drop-down button next to the user avatar.
Select “NEW Folder”. It will open a pop-up.
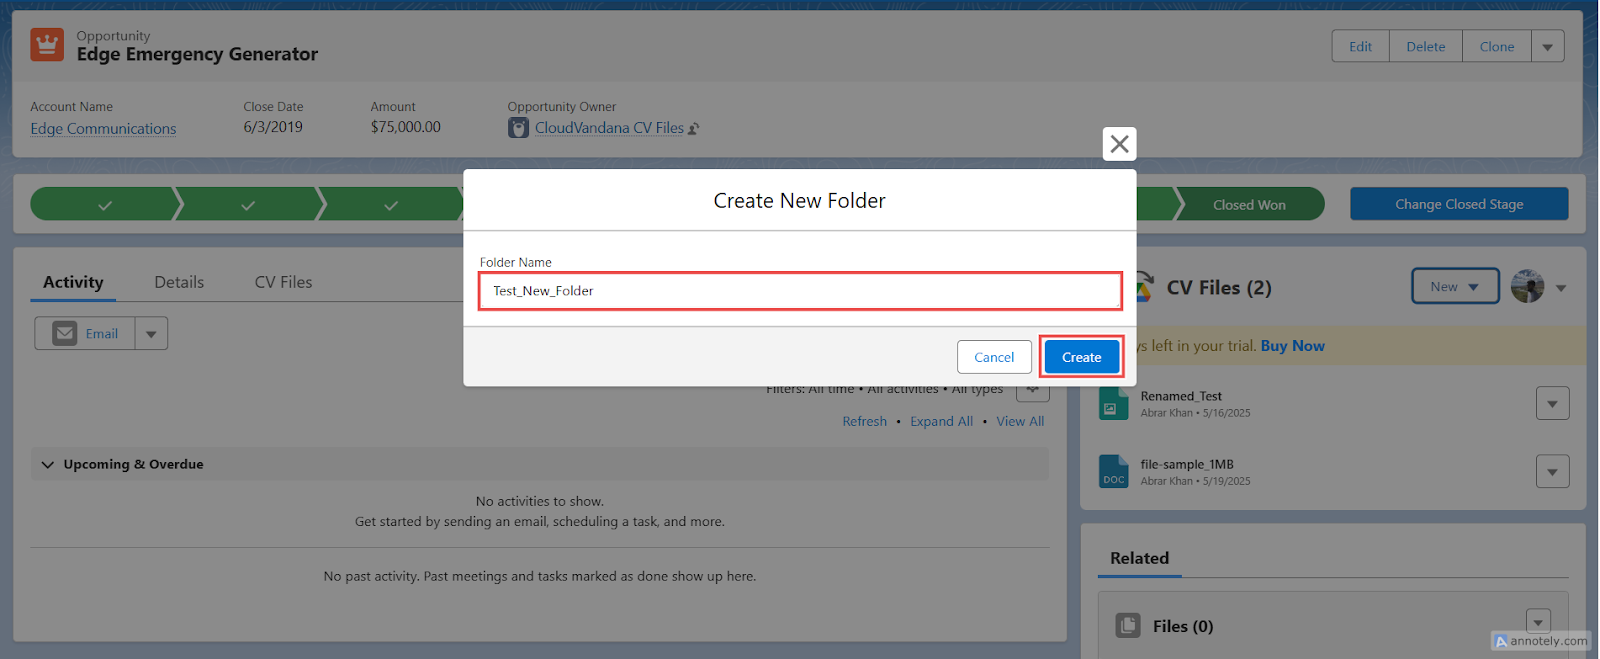
Enter the desired name of the file/folder, and then click “Create”.
The folder will be created in Google Drive. It will be automatically linked to the current Salesforce record.
You can now upload files to this folder or set it as the default folder for the record.

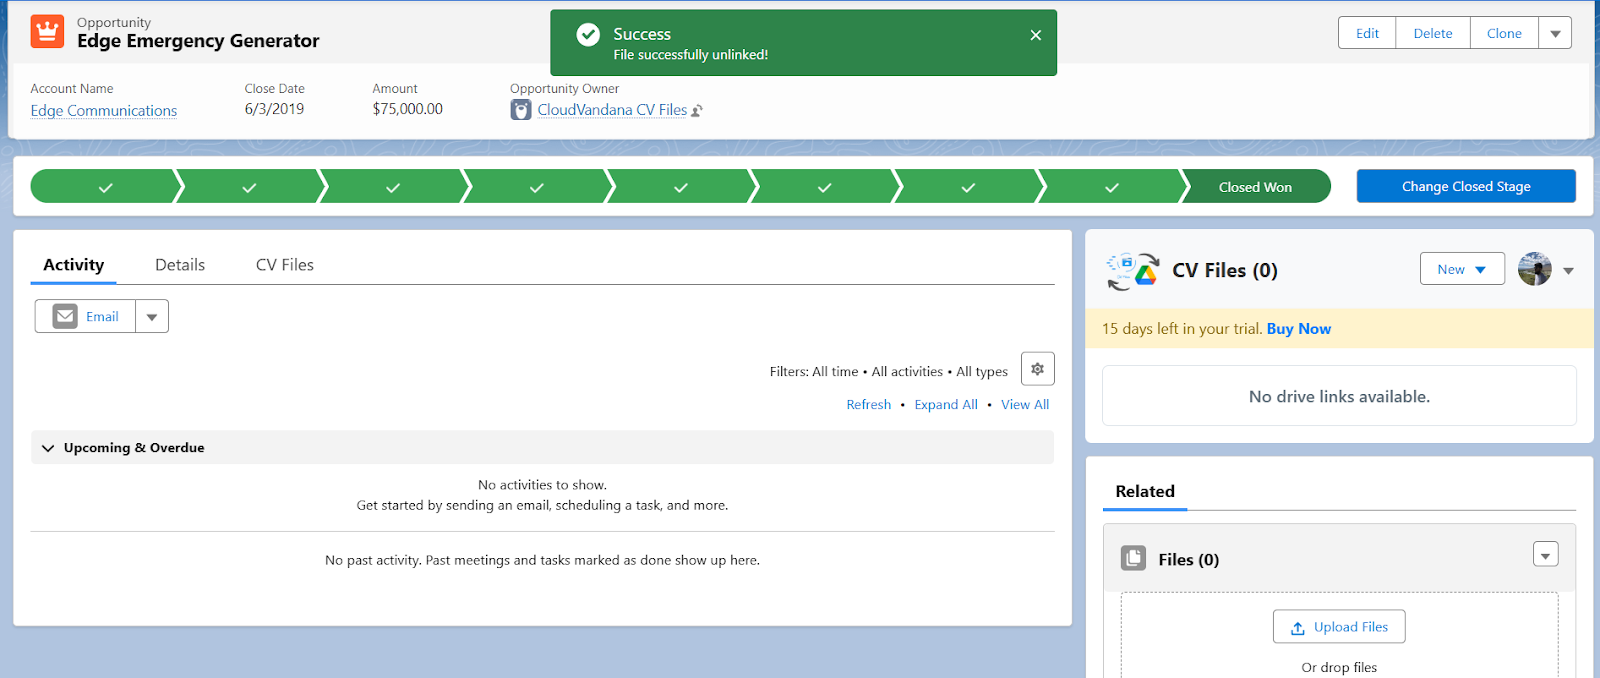
Unlink the File/Folder:
You can remove the linked file or folder from the current Salesforce record without deleting it from Google Drive.
Locate the linked file or folder in the file list for the current record.
Click the dropdown button on the right-hand side of the file/folder name (down arrow icon).
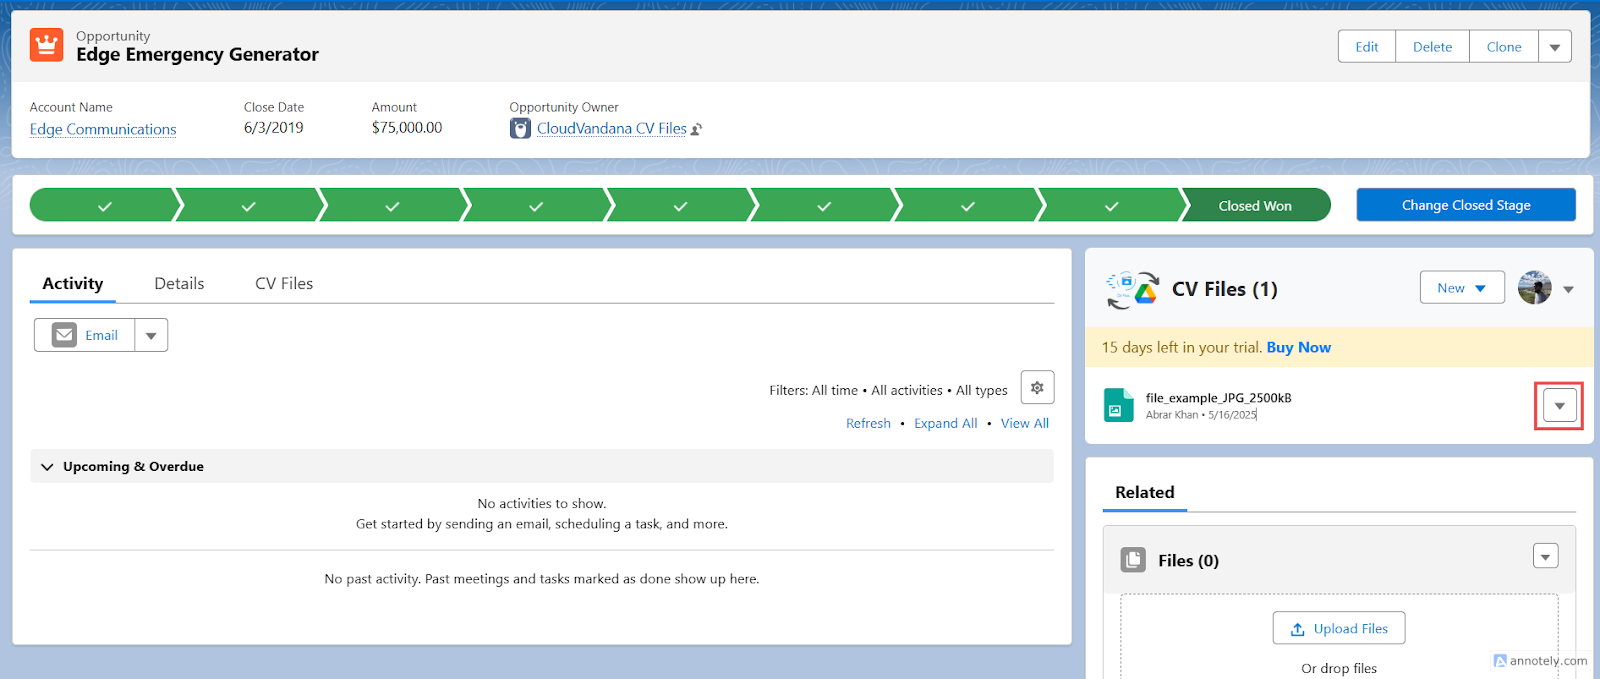
In the dropdown menu, click “Unlink”.

The file/Folder will be successfully unlinked from the record, but the file remains in Google Drive
Rename the File/Folder:
You can rename a file or folder directly from within Salesforce. The new name will also be reflected in Google Drive.
Locate the linked file or folder in the file list for the current record.
Click the dropdown button on the right-hand side of the file/folder name (down arrow icon).
In the dropdown menu, click “Rename”.

It will open a pop up enter the desired name of the file/folder, and then click “Save”.
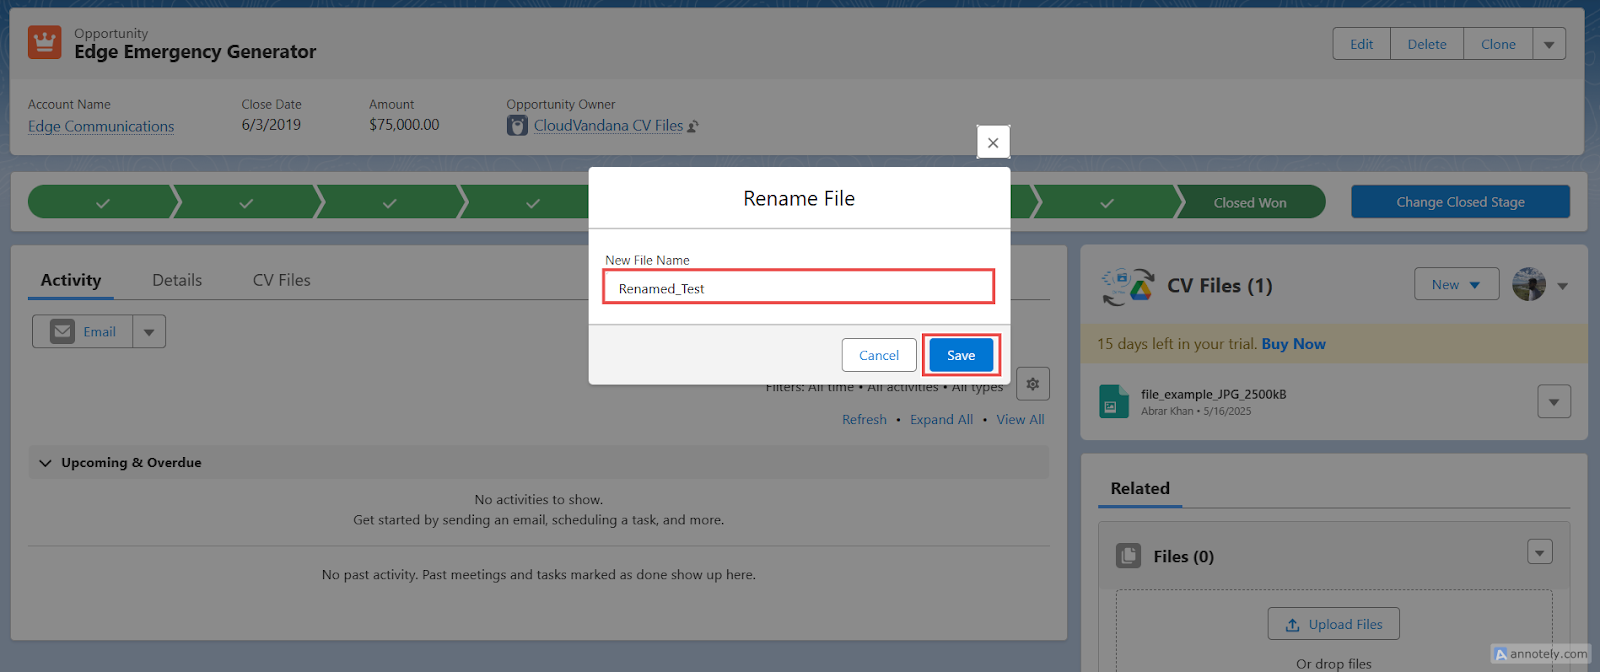
The file/Folder will be successfully renamed. Make sure you have rename permissions for the selected file or folder in Google Drive.
In the Google Drive
View File/Folder in Google Drive:
You can quickly open and manage any linked file or folder directly in Google Drive from within Salesforce.
Locate the linked file or folder in the file list for the current record.
Click the dropdown button on the right-hand side of the file/folder name (down arrow icon).
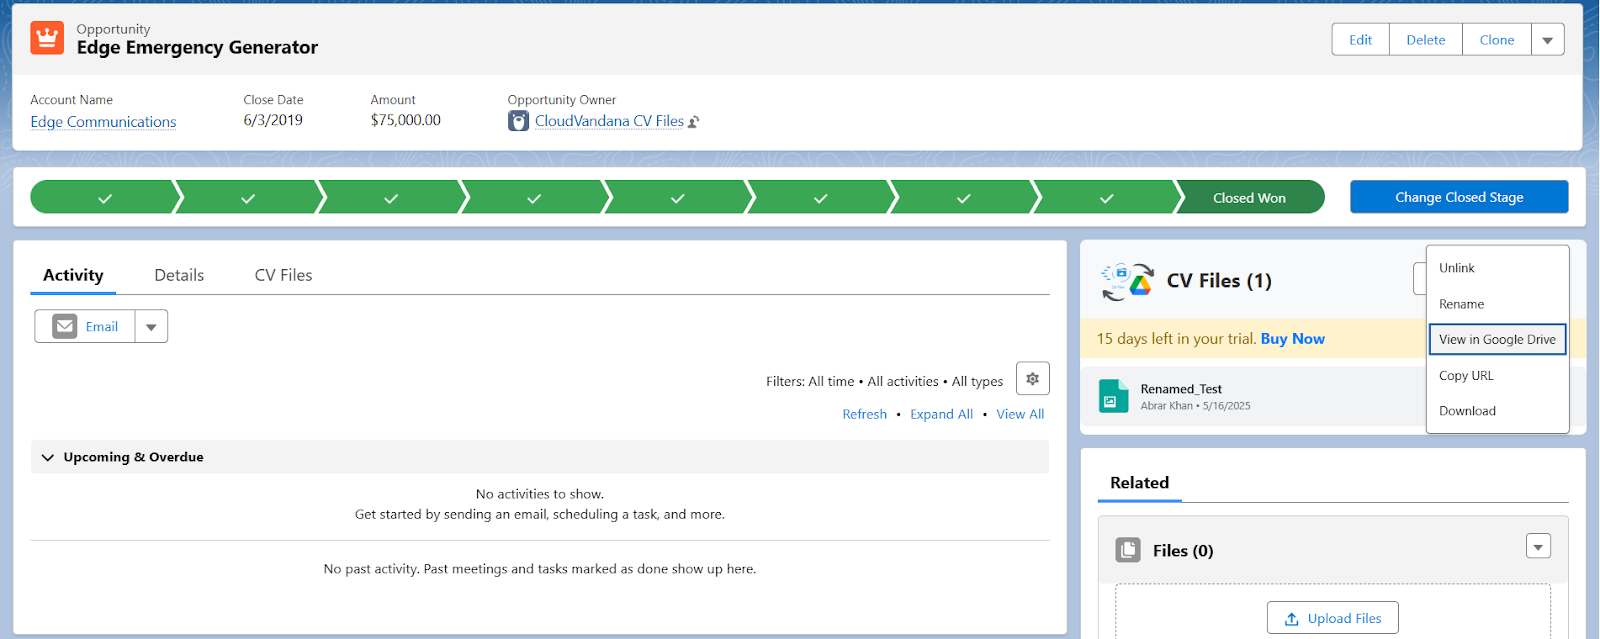
In the dropdown menu, click “View in Google Drive”. It will open a file/folder in Google Drive in a new tab in the browser.
You can then preview, manage to share, or organize it directly in Google Drive.
Copy the URL of the File/Folder:
You can easily copy the direct Google Drive link to any linked file or folder from within Salesforce.
Locate the linked file or folder in the file list for the current record.
Click the dropdown button on the right-hand side of the file/folder name (down arrow icon).
In the dropdown menu, click “Copy URL”. It will open a file/folder in Google Drive in a new tab in the browser.
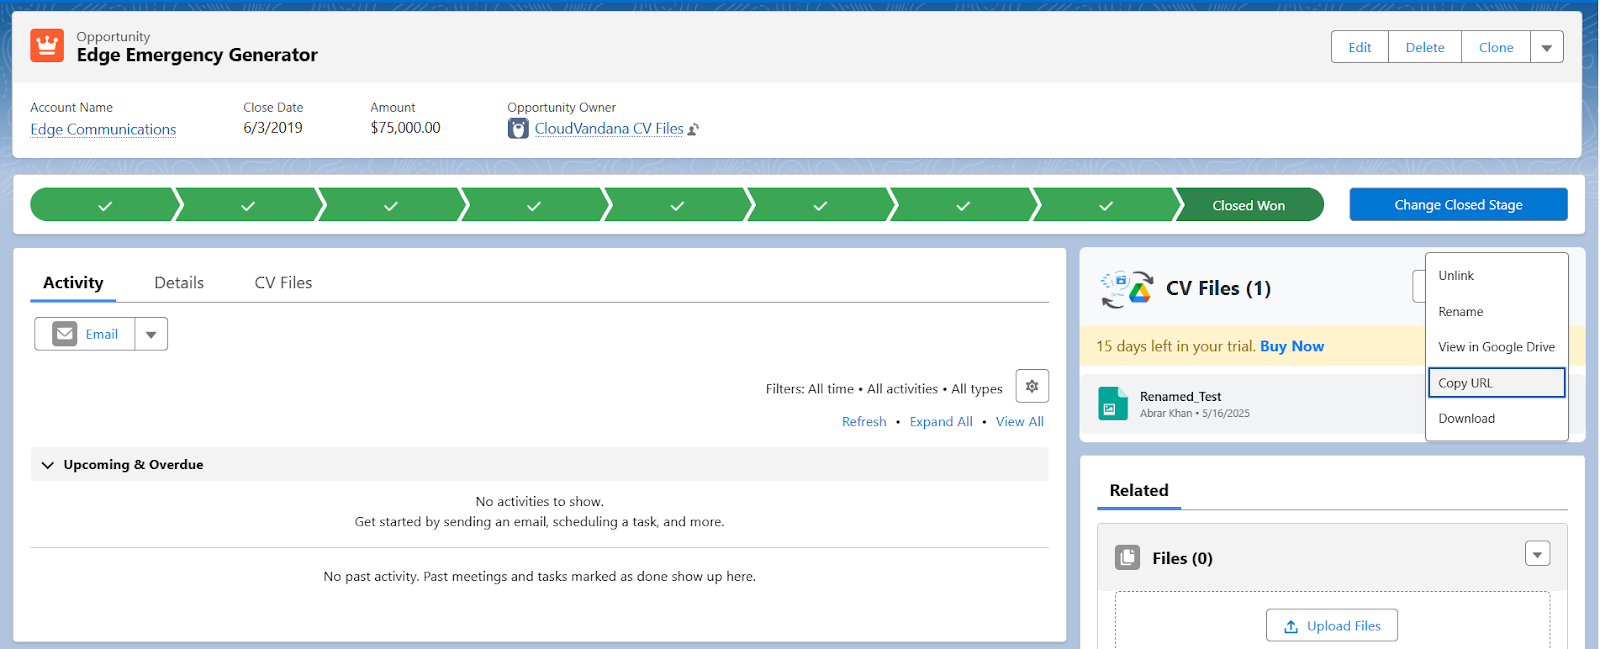
The URL of the selected file or folder will be copied.
Download File:
You can download a file linked to a Salesforce record directly from the file list.
Locate the linked file or folder in the file list for the current record.
Click the dropdown button on the right-hand side of the file/folder name (down arrow icon).
In the dropdown menu, click “Download”.
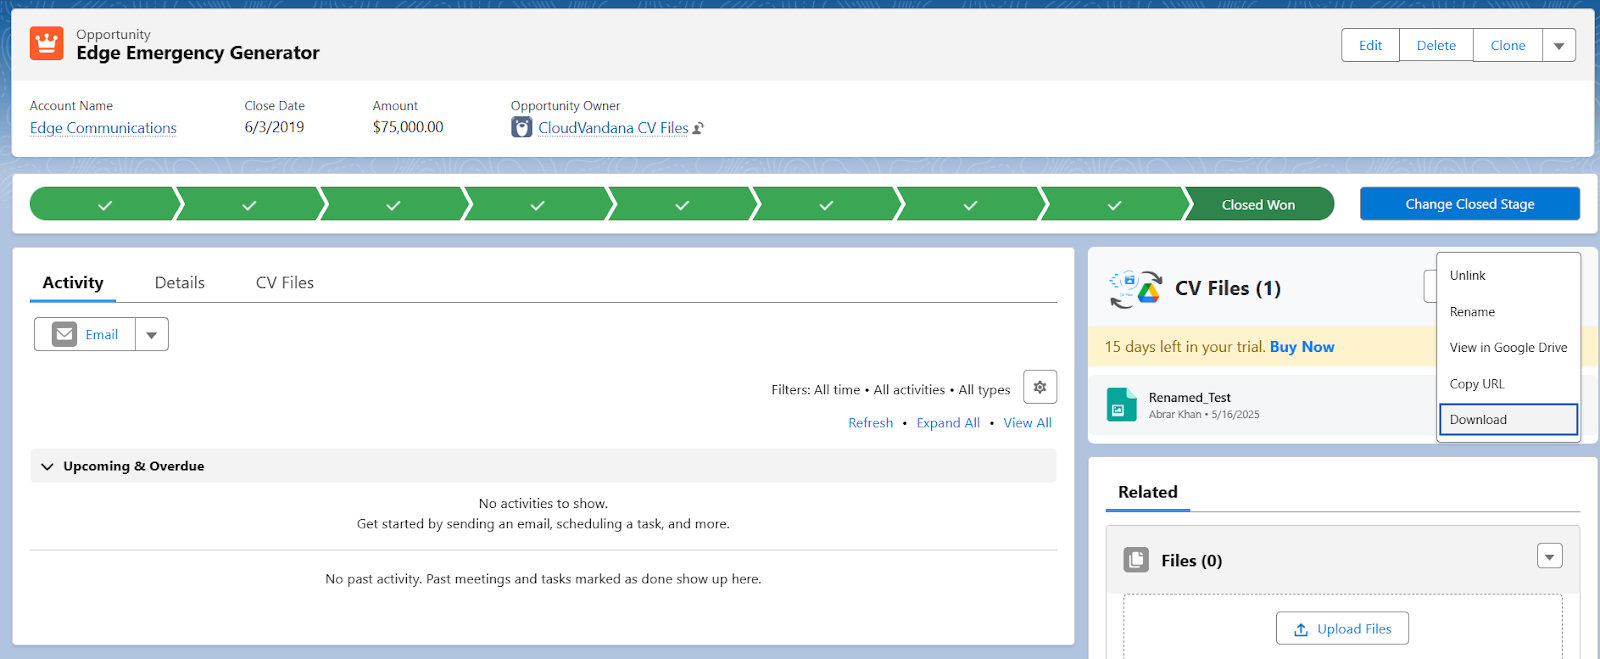
The Selected File will download. Make sure you have rename permissions for the selected file or folder in Google Drive.

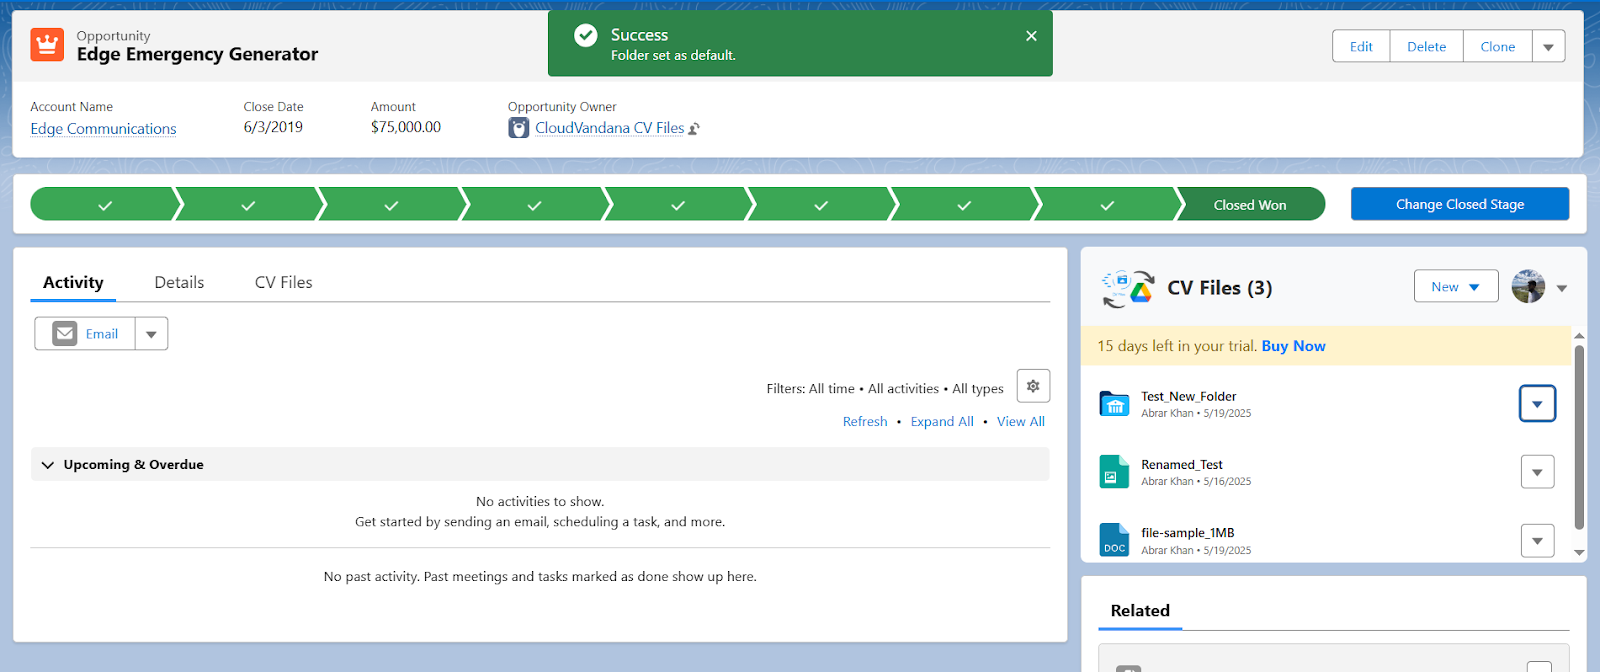
Set as Default Folder:
You can designate a specific linked folder as the default folder for a Salesforce record. This makes it the primary location for future uploads or folder references.
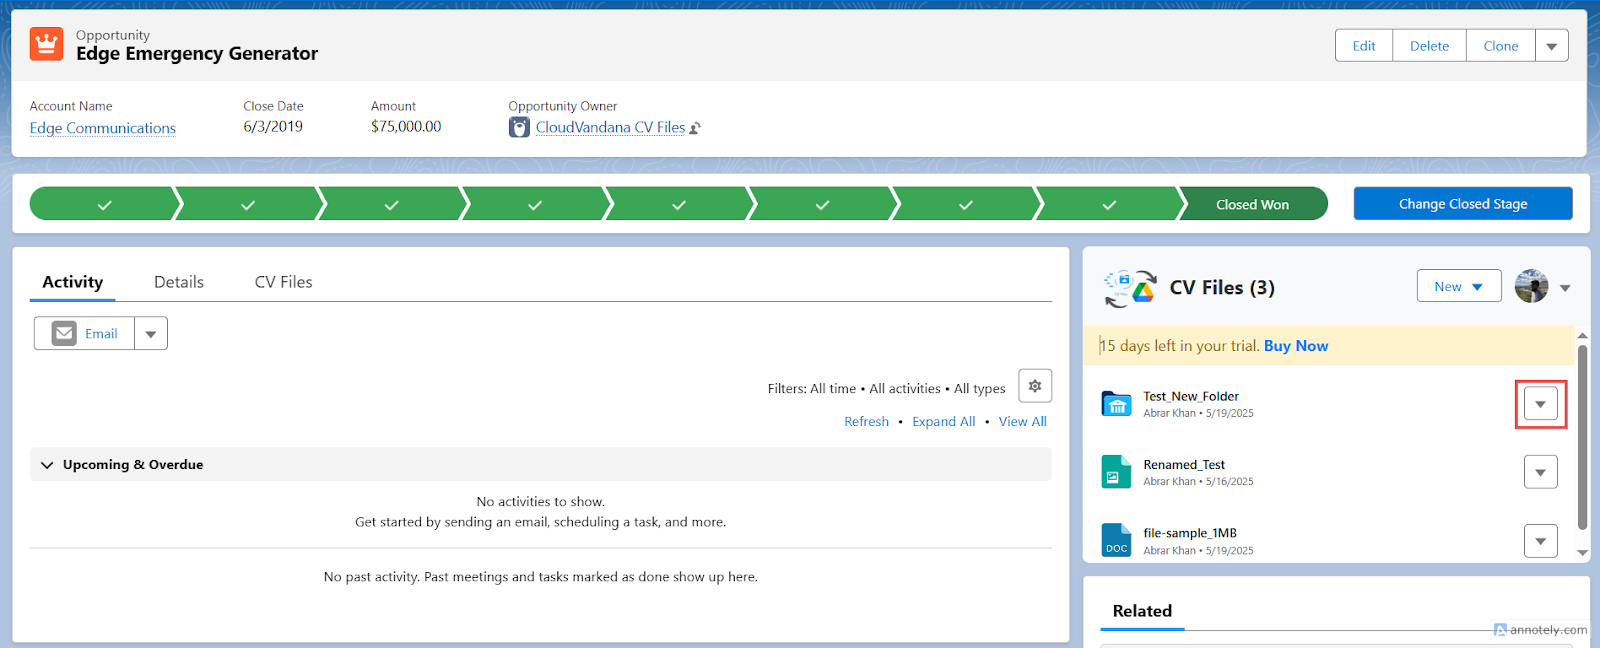
Locate the linked file or folder in the file list for the current record.
Click the dropdown button on the right-hand side of the file/folder name (down arrow icon).
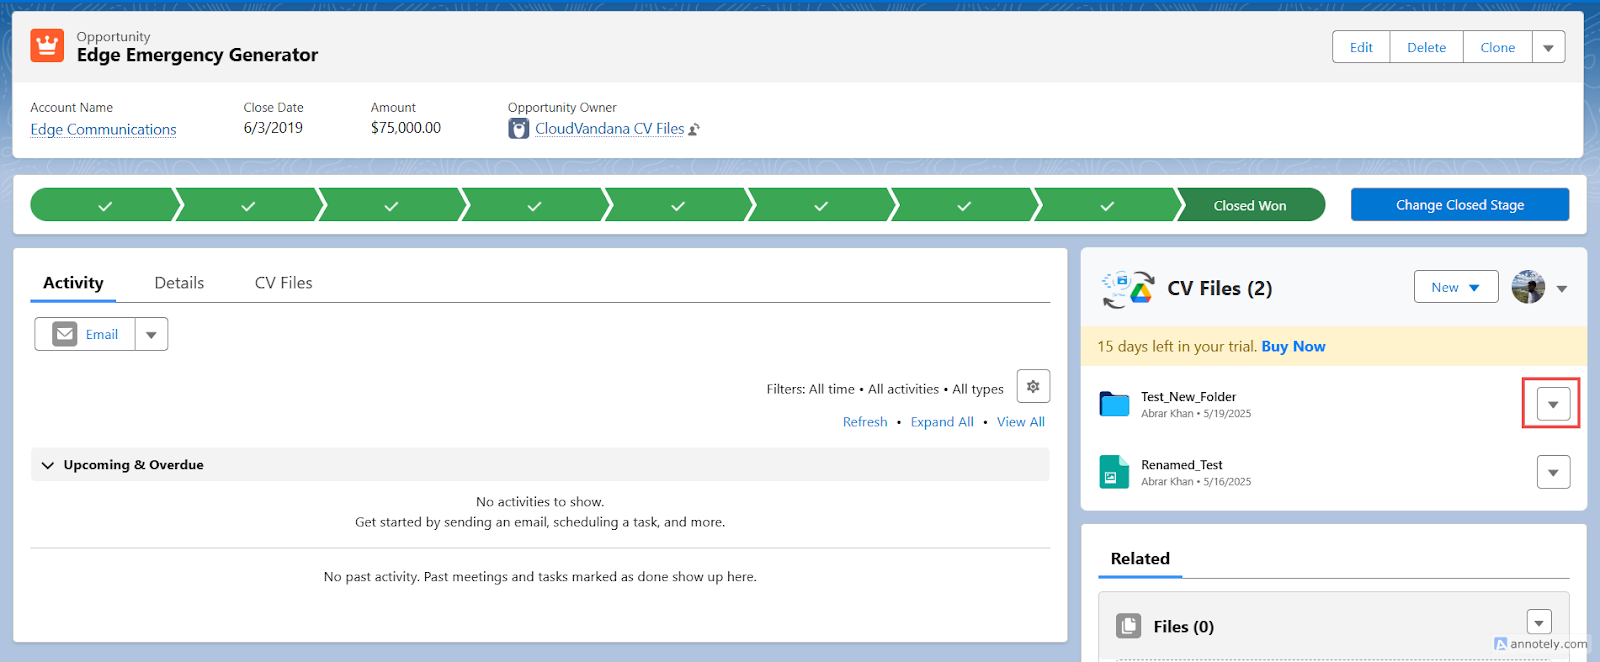
In the dropdown menu, click “Set as Record Default”.It will set the selected folder as Salesforce’s current record default folder.
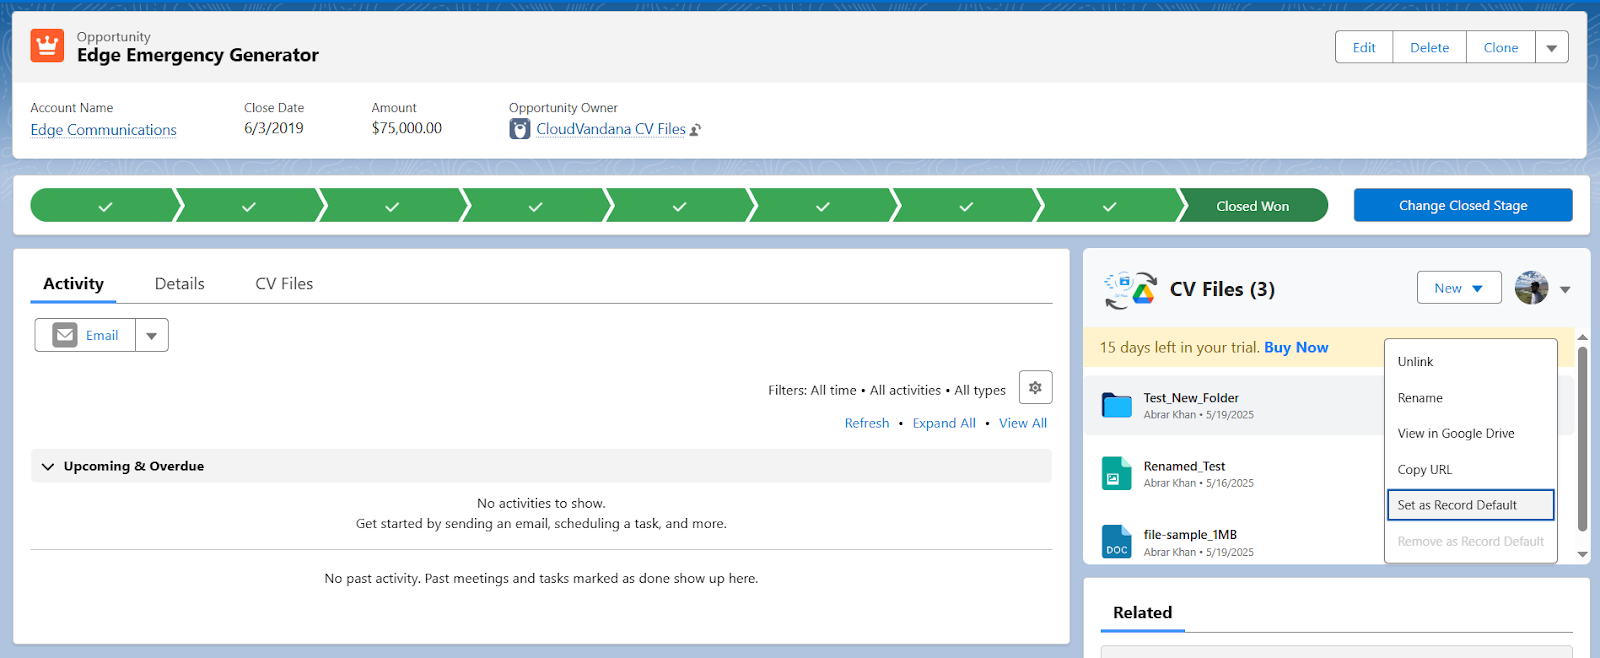
The selected folder will be set as the default folder.
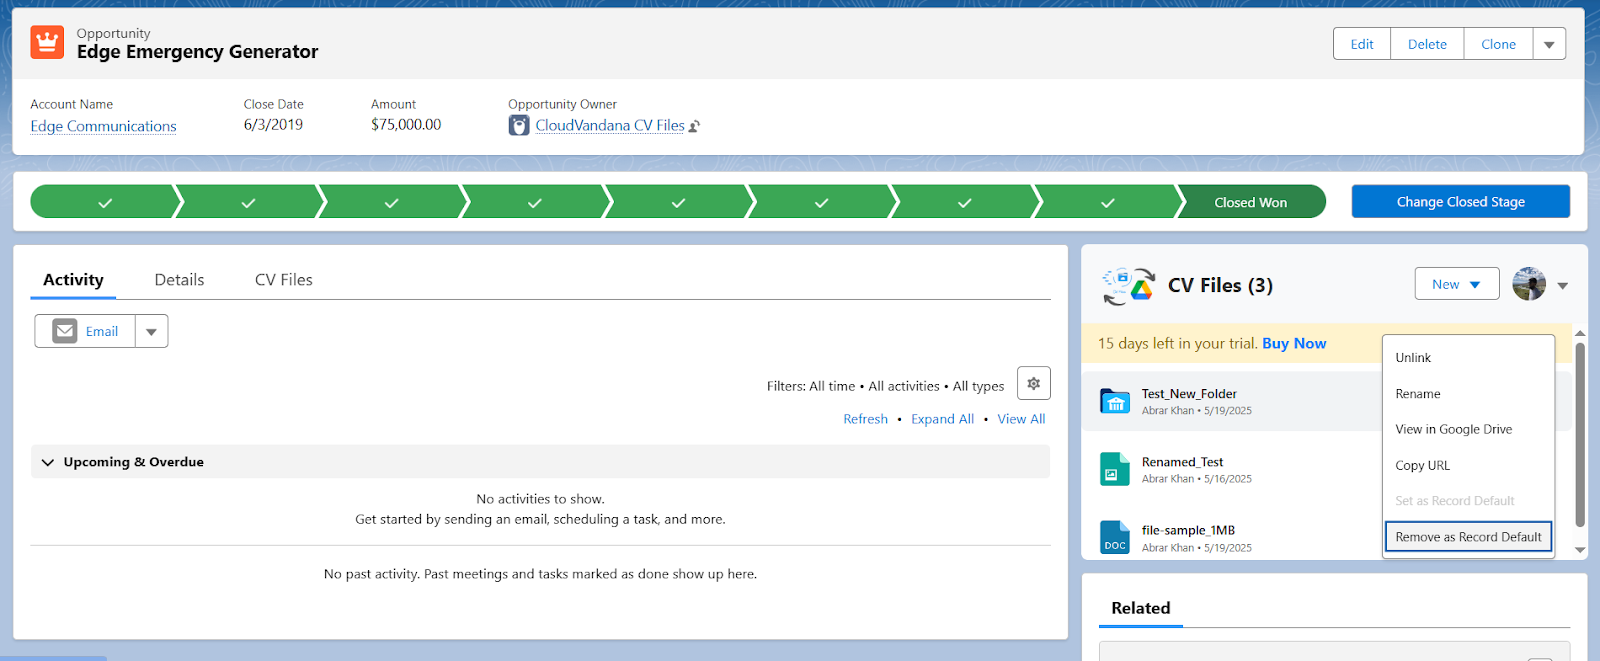
Remove as Default Folder:
If you no longer want a folder to be the default for a Salesforce record, you can easily remove its default status.
Locate the linked file or folder in the file list for the current record.
Click the dropdown button on the right-hand side of the file/folder name (down arrow icon).
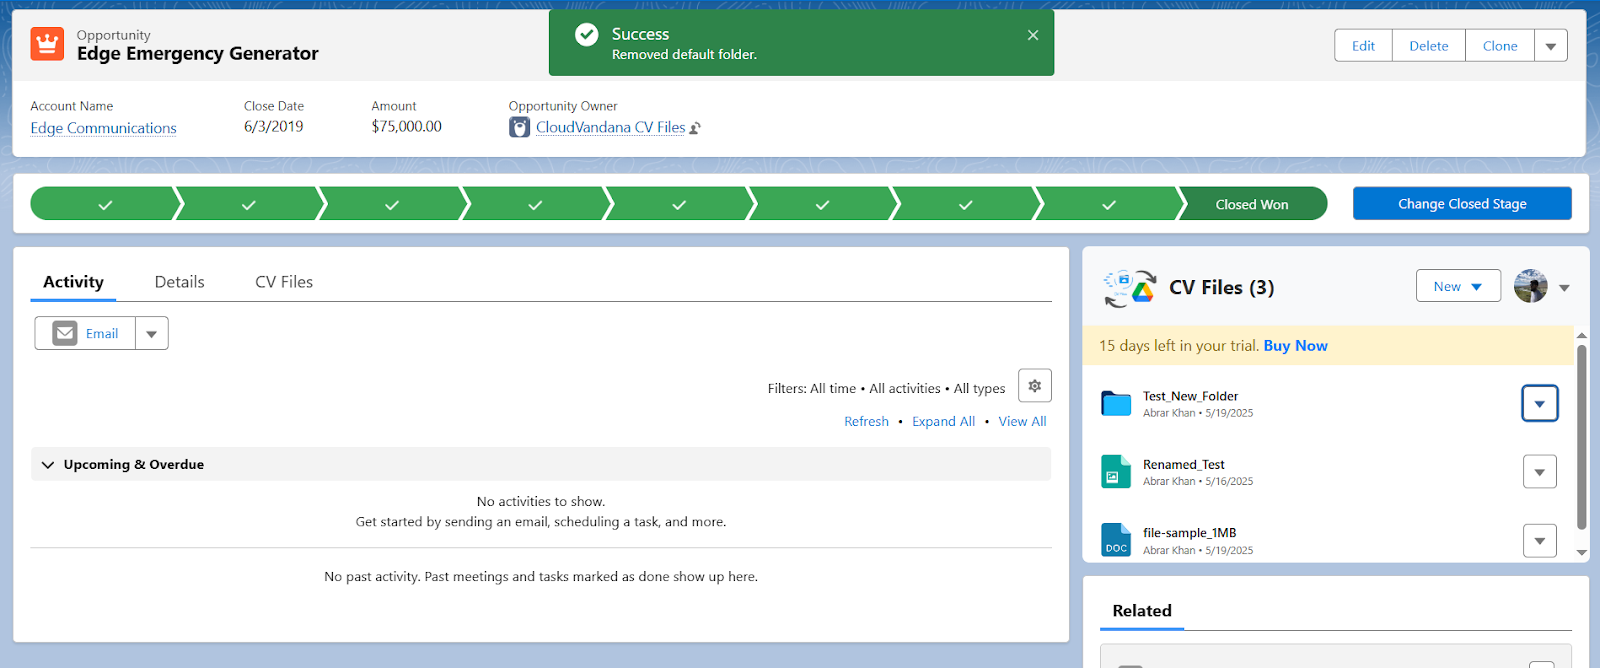
In the dropdown menu, click “Remove as Record Default”.It will remove the selected folder as Salesforce’s current record default folder.
The folder will no longer be marked as the default. No default folder will be set for the record unless you choose another folder manually.
OneDrive
With the CV Files app, you can connect your One Drive with Salesforce, and you can upload files to save them in your One Drive.
Now, if you navigate to the App Launcher and select the object in which you have added the CV Files tabs, then, you will see the CV Files component
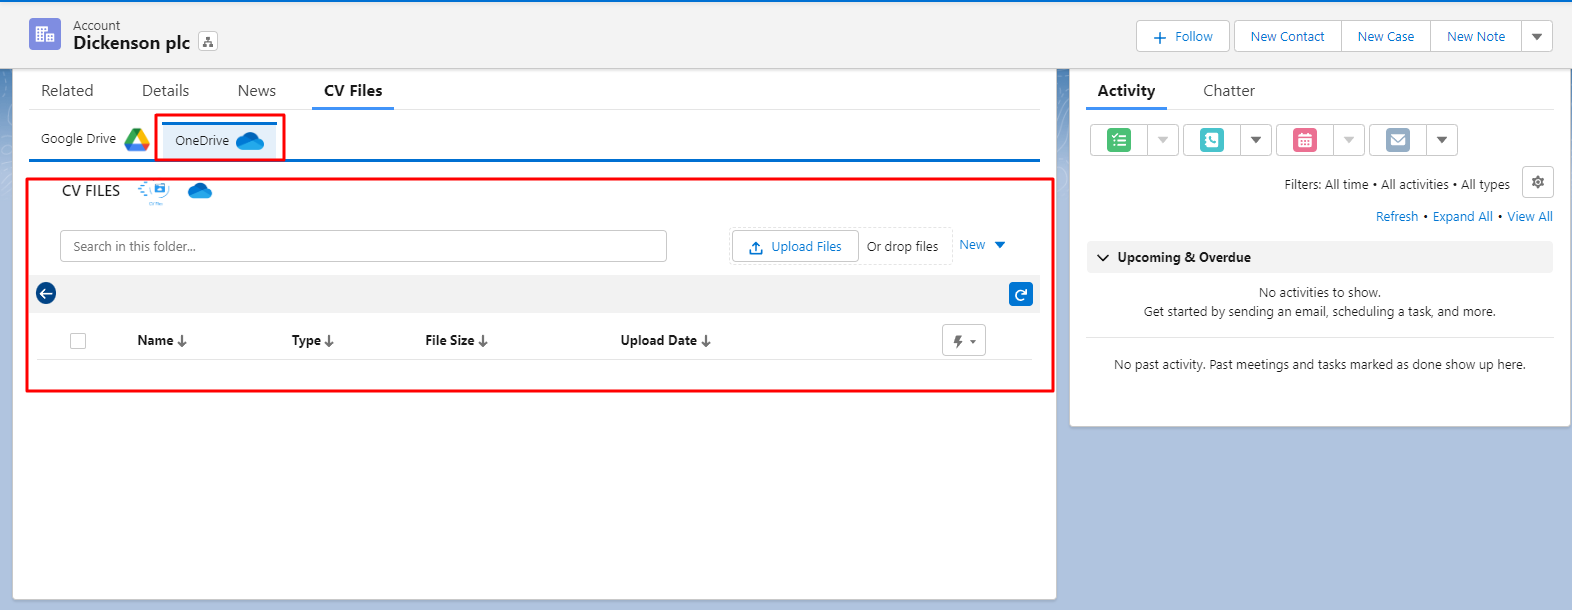
You will find the option to “Upload Files” from here, you can upload files to a record, and it will automatically save in your one drive. You can also Drag a file to the “Upload Files” section and upload it instantly.

You can see the list of all the files uploaded to the Salesforce record on the component.

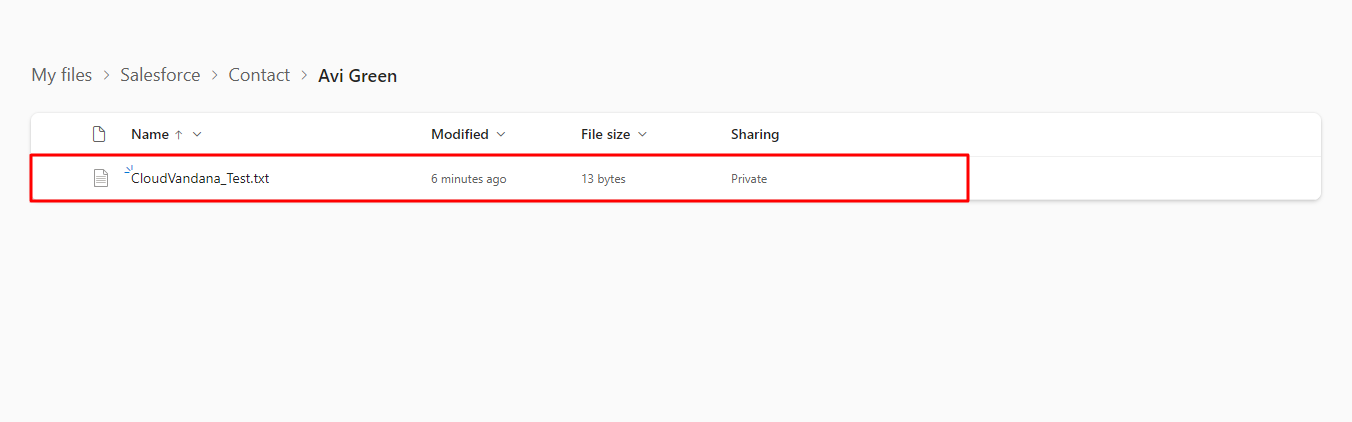
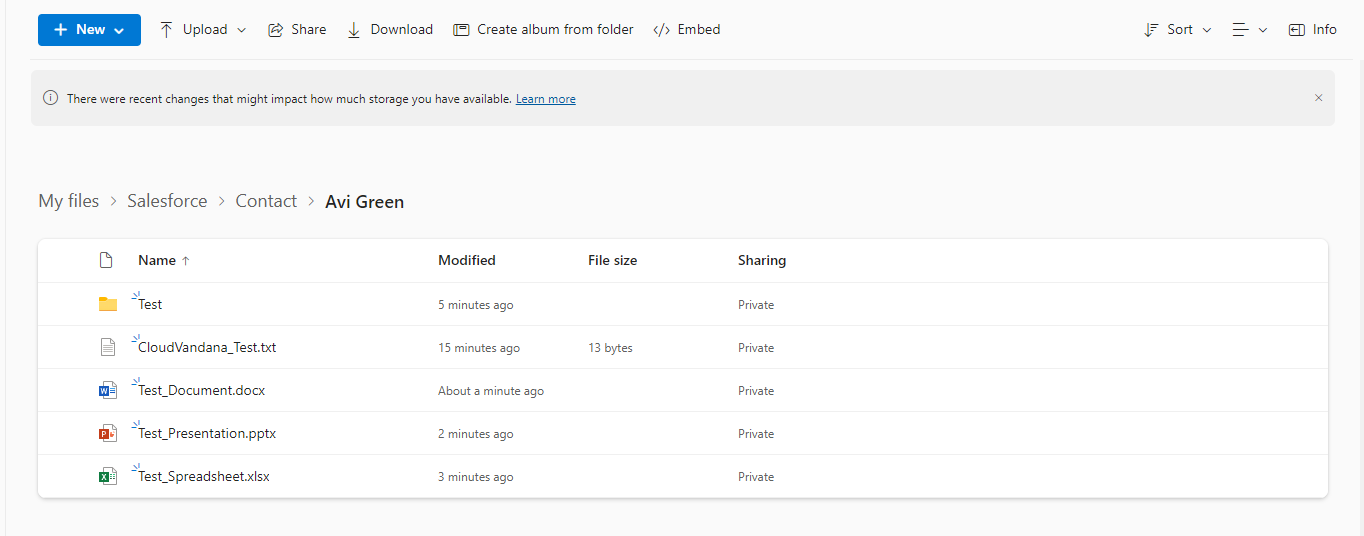
After uploading a file, you will see in your OneDrive, A folder for the object has been created in the Salesforce folder.
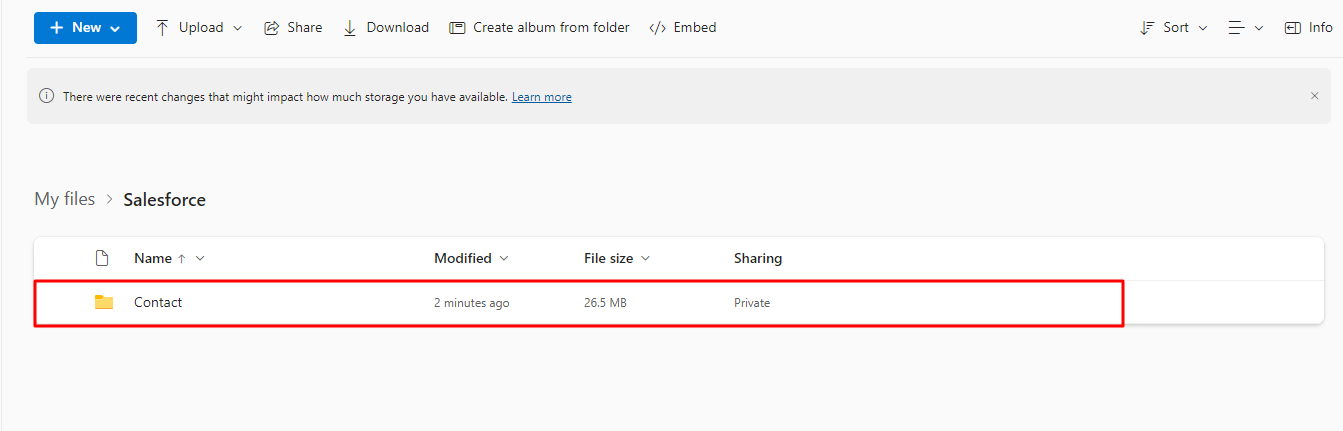
You’ll find a folder created for the Record name inside the object folder.
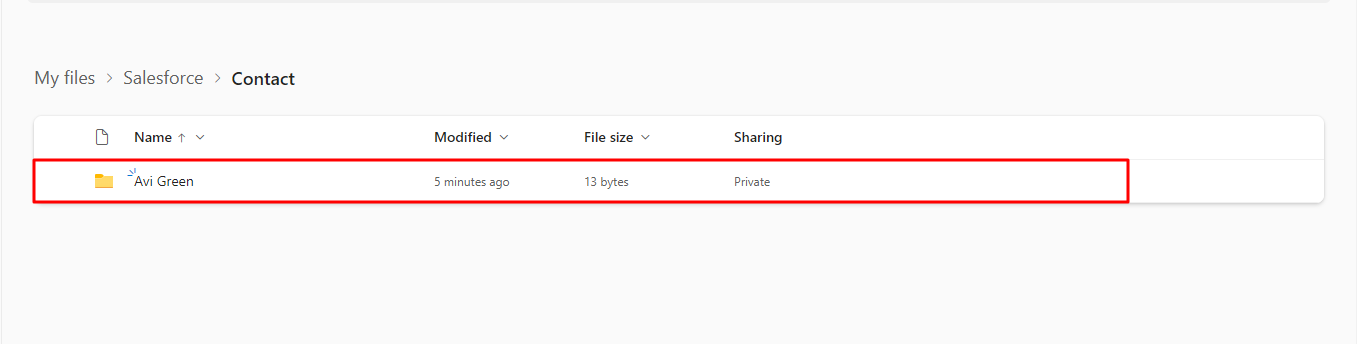
The files related to this record are inside the folder. All the objects and records follow this hierarchy.
On the component, three options are available to interact with the file: “Download”, “Delete” and “Rename”.
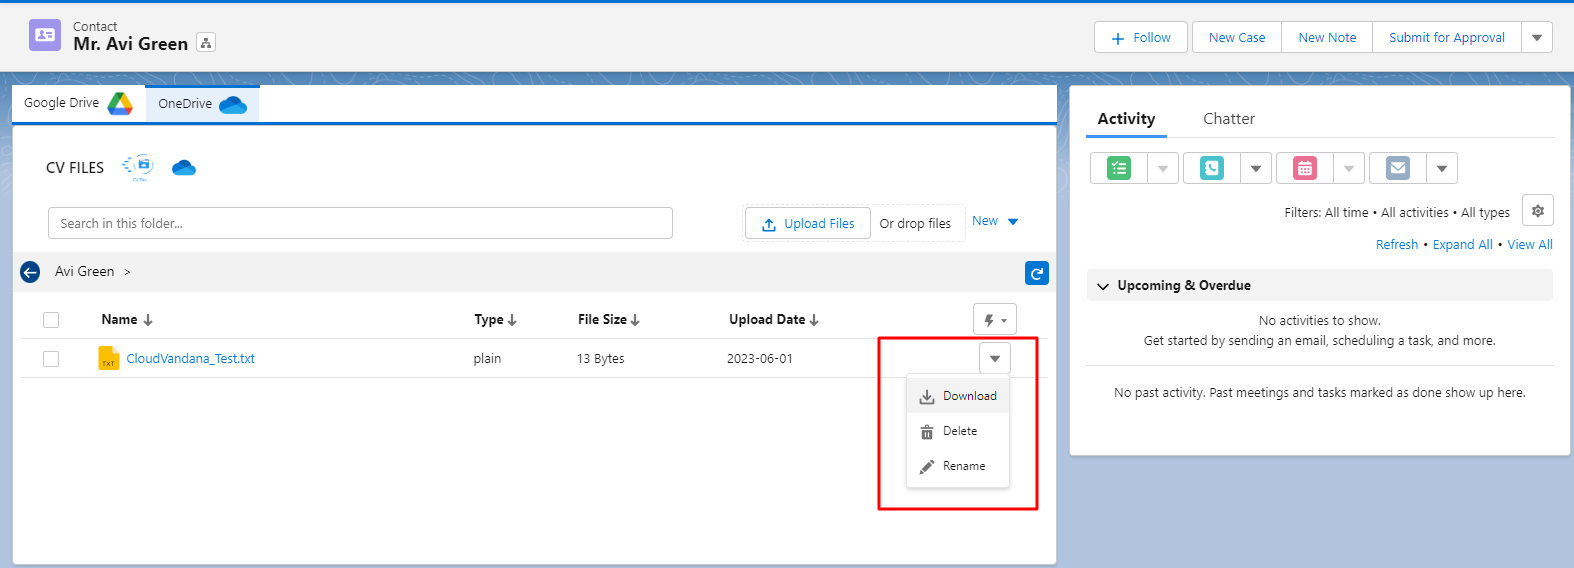
Download: From the download option, you can download the file to your local storage.
Delete: You can also delete the file & the file will automatically be deleted from the respective One Drive folder.
Rename: You can also rename the file.
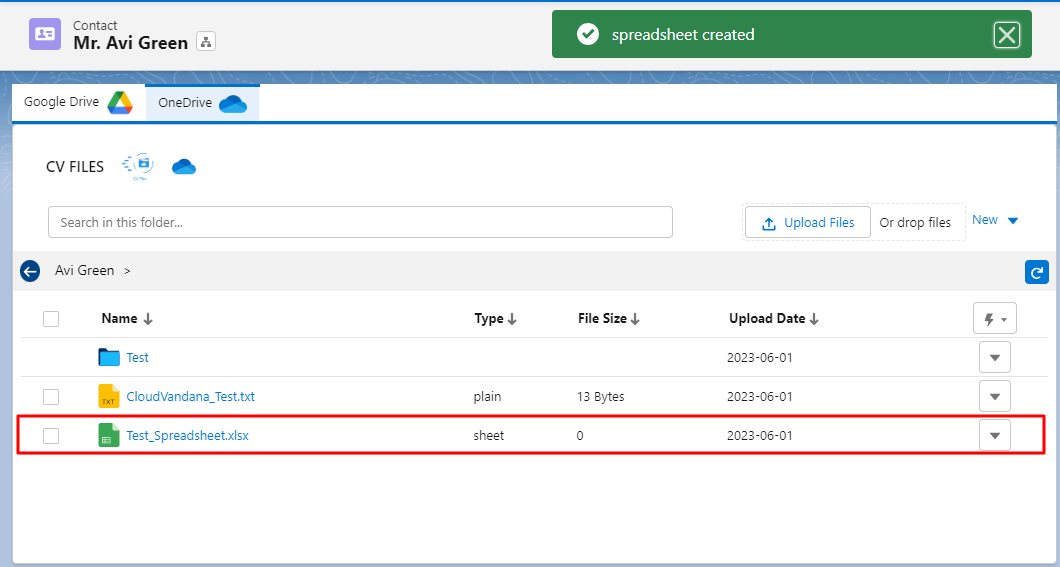
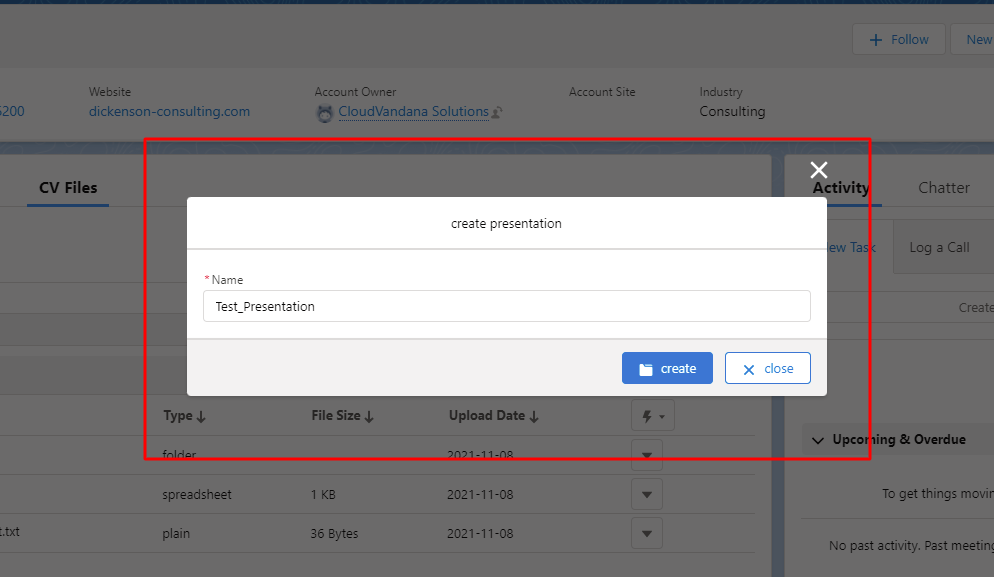
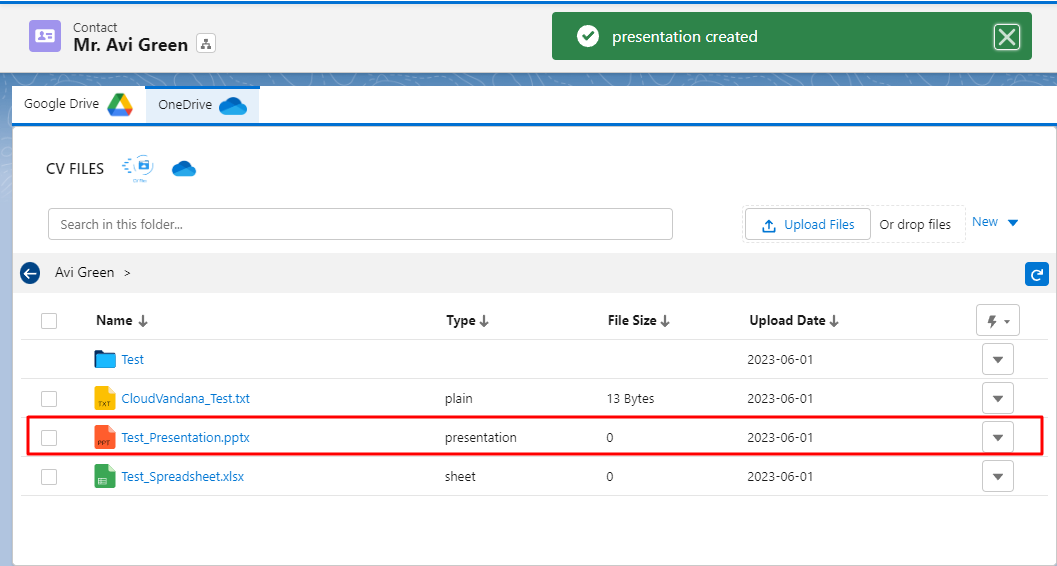
In the CV Files app, you have the option to create “Folder”, “Spreadsheet”, “Presentation” and “Document”.
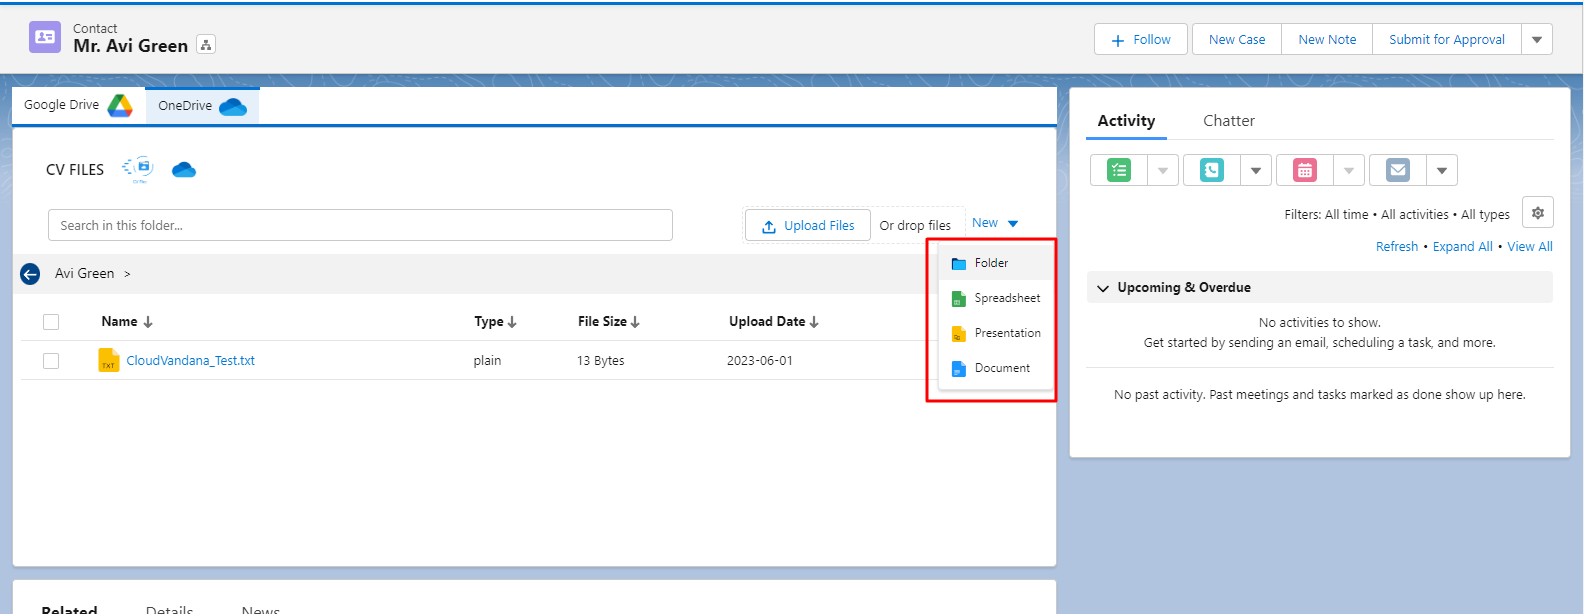
Create Folder:
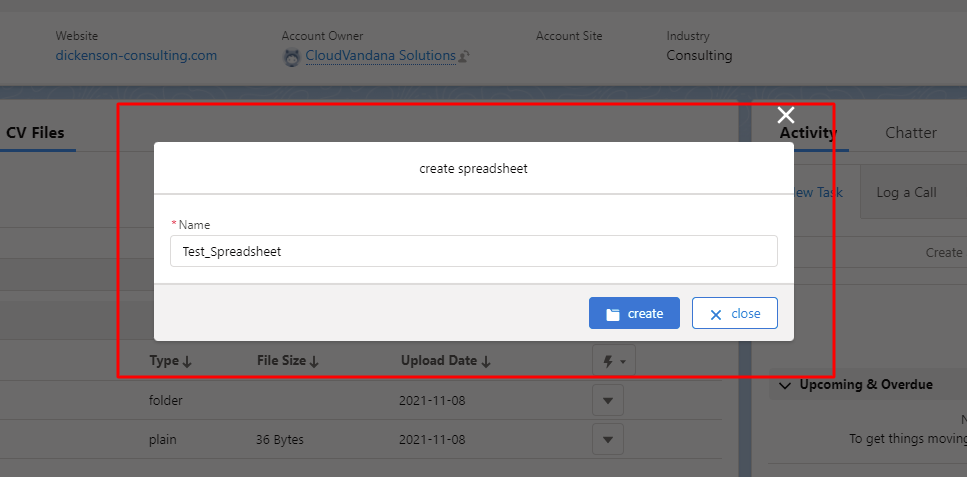
Create Spreadsheet/Google Sheet:
Create Presentation/Google Slide:
Create Document/Google Doc:
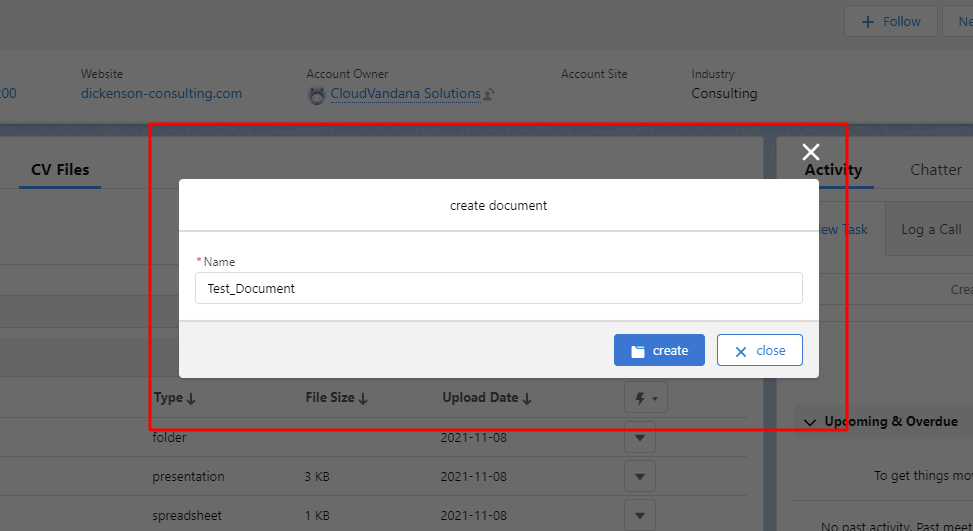
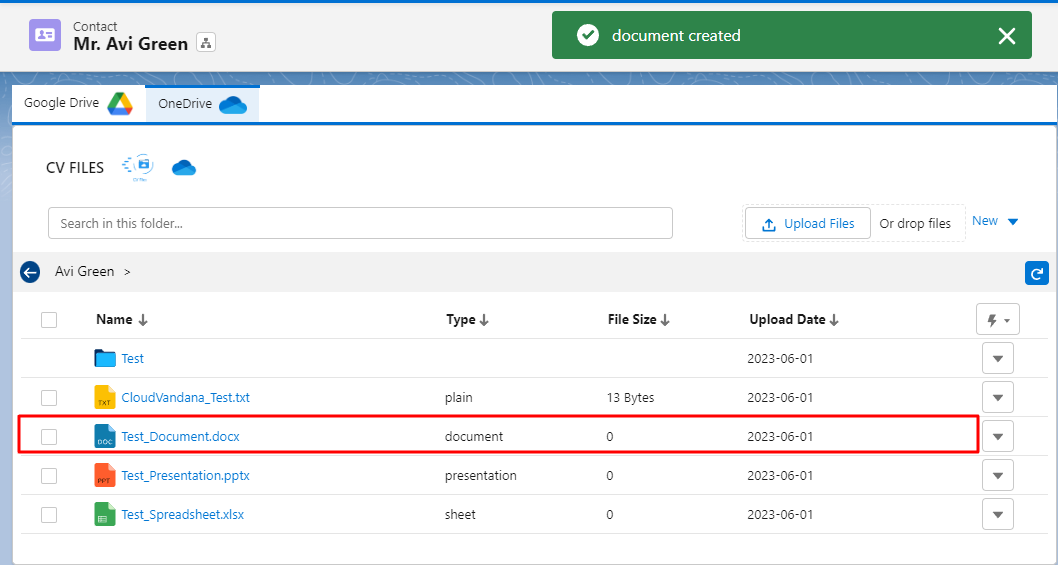
Logging into your One Drive, you will find a new folder, spreadsheet, presentation and a document created.
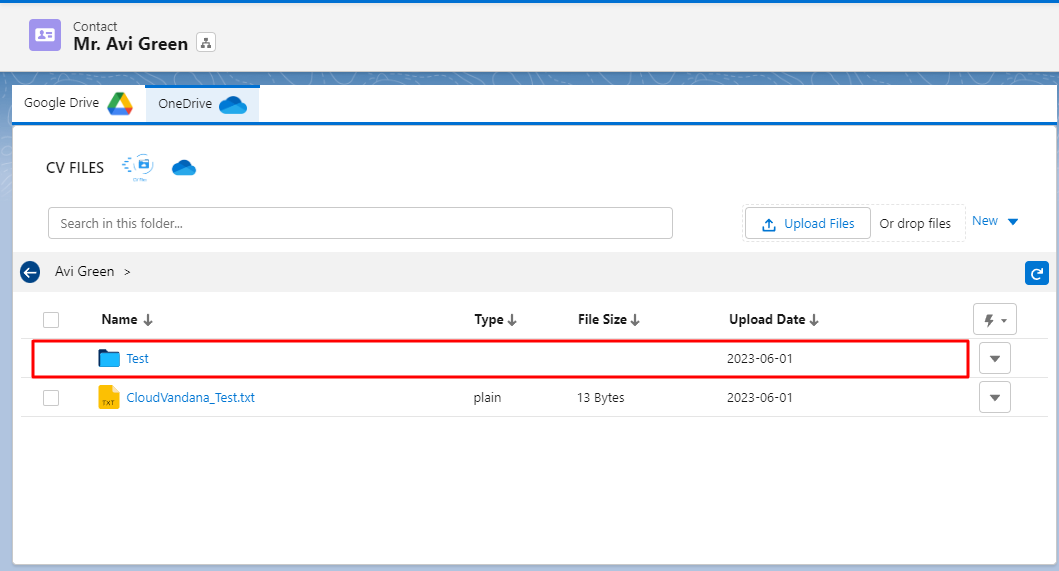
Move Files/Folders
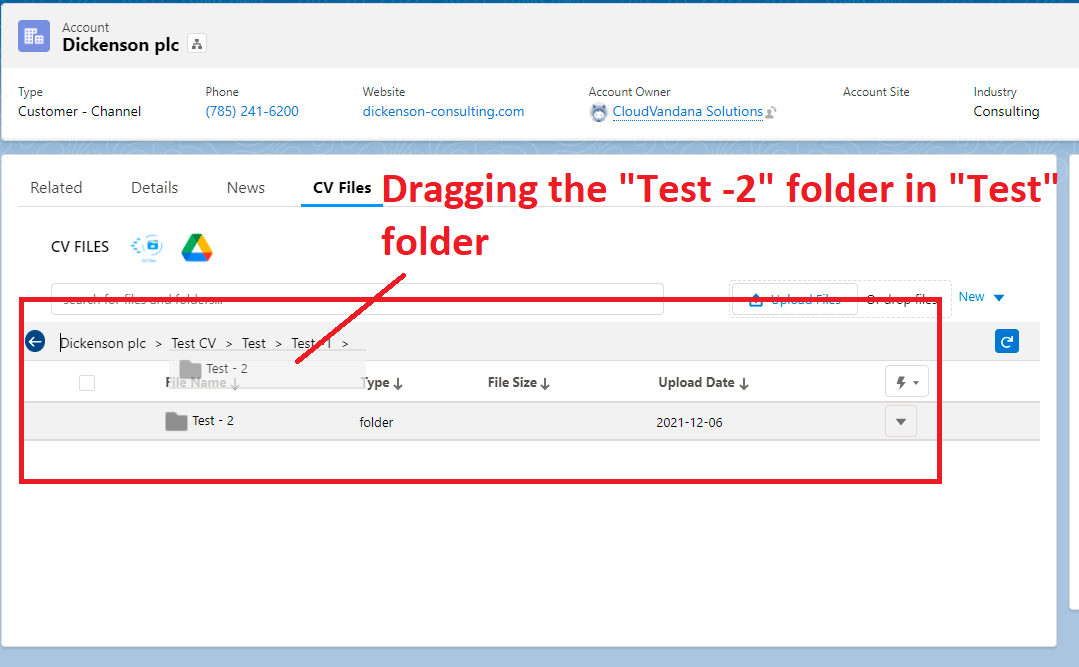
You can move files and folders by just “drag and drop”.
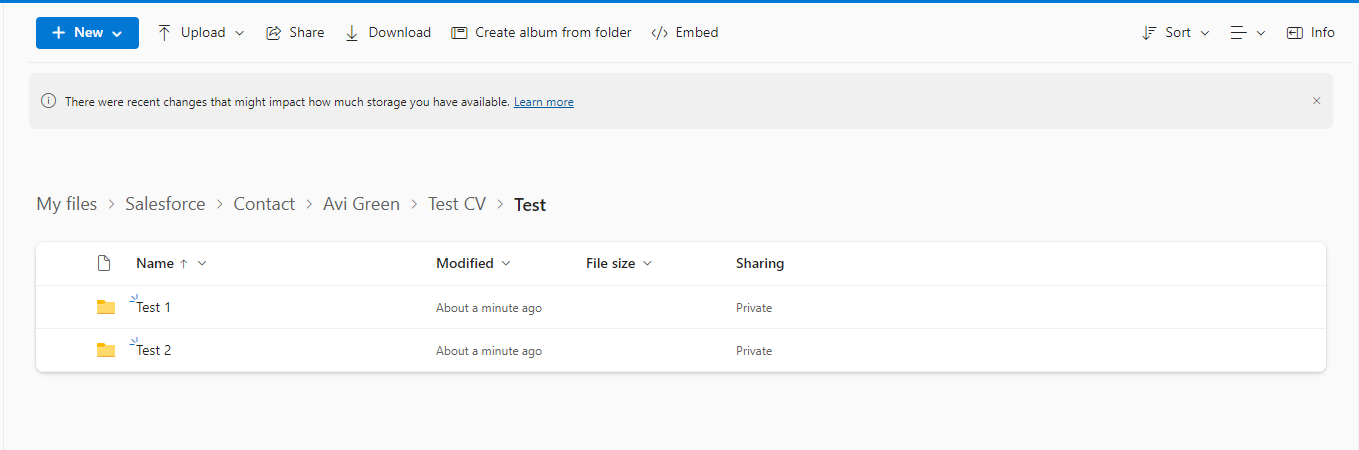
For example, here, we have created a Test CV folder in the “Avi Green” record. And in the Test CV folder, a new Test folder is created, the Test -1 folder is created under the Test folder, and the last Test-2 folder is created in the Test-1 folder.
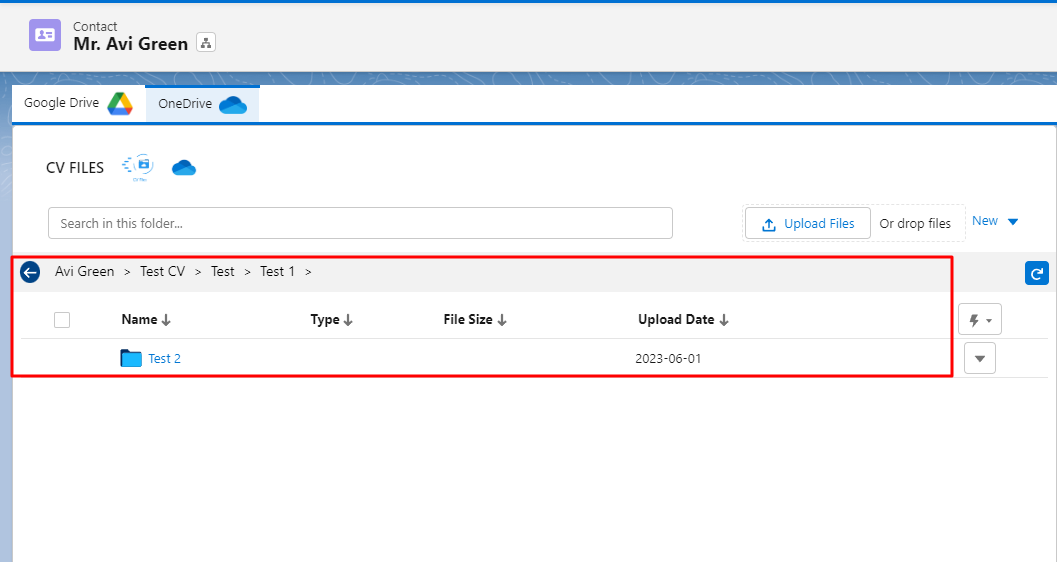
So, we can easily drag and drop any folder.
Example:- Let’s drag the “Test-2” folder in the Test folder. So it will easily save in the Test folder.
Now when you open the “Test” folder, you will find the “Test-2” folder is saved in the Test folder.
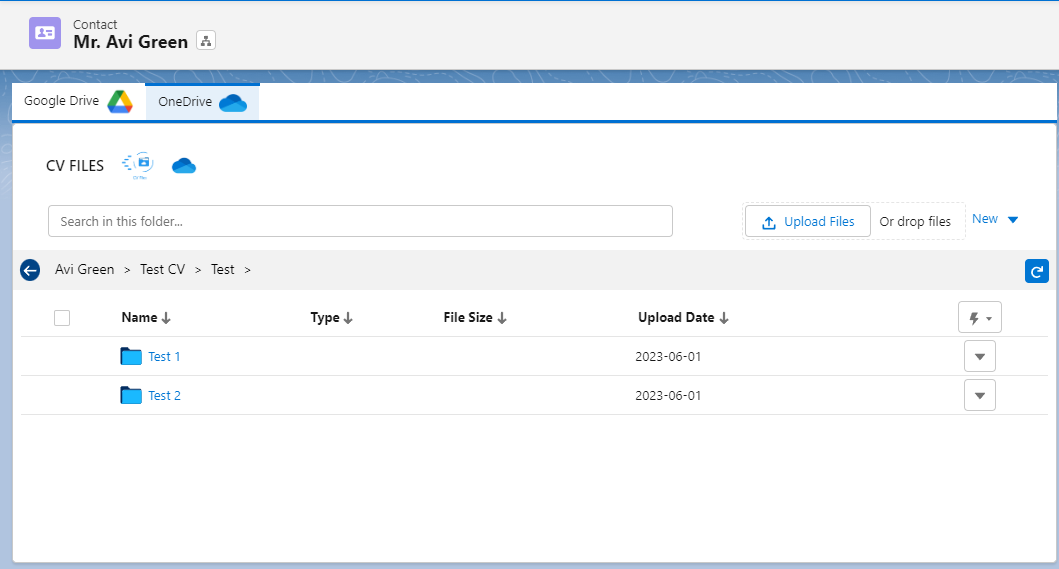
And when you open the drive folder, you will find the “Test -2” folder saved in the “Test” folder as well.
Google Drive Automation
Learn how to use CV Files Automation to create folders/subfolders, move files/folders, and rename them inside Google Drive — all directly from Salesforce or Flow.
Folder Creation In Google Drive
Select the “New Drive folder” option from the operation selection drop-down.

Under Folder Name, type the name directly
OR
Click the merge field icon to open the merge field picker. Select fields like: $Record.Name, $Record.CreatedDate.

Click on the “Destination” dropdown. You’ll see 4 options:

If you choose:
Record/Object Default – nothing else is needed.
Linked Folder – enter the name of the linked folder or use a merge field.
Google Drive – a pop-up opens where you can browse and select a folder.
Optional Flags
Check “Set as Default Record Folder” to make the new folder the default for the record. Only one default is allowed.
Check “Link Folder to Record” to link a new folder to the record.

Child operations :
allow you to nest subfolders inside the current folder.
1. Click Add Child Operation to add a child operation
2. A nested “New Folder” block appears underneath

You can only choose New Folder for children. Name the child folder directly or use merge fields again. Optionally, you can tick the check box for linking or set the older as the default record folder.
Tips
You can combine multiple operations (e.g., move + rename + create).
Use merge fields for dynamic names like {!$Record.Name}.
Use Google Drive only if you have access to edit the folder.
Only one folder can be marked as default at a time, even across children.
You can mix root-level operations and child operations in the same automation.
Moving a File/Folder in Google Drive
The Move operation is used to relocate a file or folder to a new Google Drive folder destination.
Click on Add Operation a new operation box will appear.

Select “Move File” or “Move Folder” from the Operation Type dropdown

Now you will see two drop-downs to select File/Folder from the first drop-down and destination from the other drop-down.

Click on the “File/Folder to Update” dropdown.
Select “Linked File” or “Record Default Folder”.
If you choose:
Linked File -enter the name of a file or folder to move, or you can use a merge field similar to entering the name of a new folder, but here it will pick up all folders/files that match the entered input.
Record Default Folder– (only available in the case of moving a folder) to select the current record’s default folder.
Click on the “Destination” dropdown. You’ll see 4 options:

If you choose:
Record/Object Default – nothing else is needed.
Linked Folder – enter the name of the linked folder or use a merge field.
Google Drive – a pop-up opens where you can browse and select a folder.
Renaming a File/Folder in Google Drive
The Rename operation is used to rename a file or folder in Google Drive.
Click on Add Operation a new operation box will appear.

Select “Rename File” or “Rename Folder” from the Operation Type dropdown.
Select “Linked File” or “Record Default Folder”.

If you choose:
Linked File -enter the name of a file or folder to rename, or you can use a merge field similar to entering the name of a new folder, but here it will pick up all folders/files that match the entered input.
Record Default Folder– (only available in the case of renaming a folder) to select the current record’s default folder.

Enter the New Name of the File/Folder in the “New Name” Field. Type a new name directly, OR Click the Insert merge field icon to use record data.
Uploading an Existing File to Google Drive
This feature allows users to upload an existing file from Salesforce to Google Drive.
Click on Add Operation a new operation box will appear.
From the Operation Type dropdown, select “Upload Existing File”.

Under the File Name field type, the exact file name, OR Use a merge field. The system will look for a file with the same name attached to the record or org. It supports exact and partial match logic.

In the Destination Folder dropdown, choose where to upload the file:

If you choose:
Record/Object Default – nothing else is needed.
Linked Folder – enter the name of the linked folder or use a merge field.
Google Drive – a pop-up opens where you can browse and select a folder.
Optional Flags
Check “Link File To Record” to link the uploaded file to the current Salesforce record.
Check “Delete File from Salesforce” to delete the uploaded file from the Salesforce Org.

Files up to 11 MB are supported for upload automation.
Larger files are not supported due to Salesforce’s heap size limits. If your file exceeds this limit, consider compressing it before uploading.
Uploading a New File to Google Drive
This feature allows you to automatically upload a newly added file from Salesforce to Google Drive.
Click on Add Operation a new operation box will appear.
From the Operation Type dropdown, select “Upload a File”.

Under the File Name field, enter the new name to rename the uploaded file — or leave it blank to retain the original name.
In the Destination Folder dropdown, choose where to upload the file:
If you choose:
Record/Object Default – nothing else is needed.
Linked Folder – enter the name of the linked folder.
Google Drive – a pop-up opens where you can browse and select a folder.

Optional Flags
Check “Link File To Record” to link the uploaded file to the current Salesforce record.
Check “Delete File from Salesforce” to delete the uploaded file from the Salesforce Org.

Files up to 11 MB are supported for upload automation.
Larger files are not supported due to Salesforce’s heap size limits. If your file exceeds this limit, consider compressing it before uploading.